Showing posts with label jewelry making. Show all posts

Tuesday, April 16, 2024

Amazing Things Await You! New Book Update


It seems that spring has finally found us! Yay! As I like to say: Onward! I know some of you have been waiting patiently for promised jewelry-making videos on my YouTube channel and I have just been so wrapped up in getting this new book put together that I just had to put videos aside for the time being. (Not to mention I've been trying to squeeze in some new jewelry for Mother's Day for my Etsy shop too, as that only comes once a year!) 

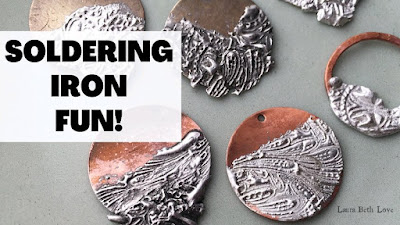
This I say as I am planning on filming today, looking for my list of video "to-do's" that are somewhere on my phone or in a notebook... I'll probably start with a quick review of my last title, Soldering Iron Jewelry, for those who are new, and some soldered dragon's claws and talons as promised a while back, and then introduce the new book. 

Here's the thing: I want so much to start the promotion and hype but I just haven't completed all of the photography (and I am picky about my book covers!) so I hate to start gabbing about it all until I have something solid to visually share with you...that said, my newest title, The Broken China Jewelry Book, is almost finished! 

All autumn and winter long I worked on putting together 25 fantastic jewelry-making projects - all using old broken china - and for all skill levels. I created projects for the newest beginner to the advanced solderer, and using all different jewelry-making techniques and styles. 

I'm so excited to share this beautiful book with you! The projects, step-photos, and writing are all finished, and the beauty photography is in the works. I still have a review or two to do of the hard copies once the photos are added, and then closer to that I'll have a release date for you. If I had to guess I'd say June, so be ready!  

Have a great week!
Laura


Have a great week!
Laura

Article and images copyright ©Laura Beth Love 2024 and may not be republished in print or other media without express written permission from the author.

Sunday, March 19, 2023

Jewelry Making: How To Carve An Egyptian Scarab From A Cabochon


Hey friends! I always wanted to learn how to #1 carve stones and #2 create my own scarabs—remember those bracelets from the 1920's through the 1960's? I love them. 

When I was a little girl I remember my mom letting me look at the pieces she had in her jewelry box (high school: class ring, nursing school: class ring, nursing school: pins, clip-on and screw-on earrings with baroque pearls, the odd brooch shaped like a big gold leaf with pearls, a couple ladies watches...and the colorful scarab link bracelet. I think it was my favorite thing in her jewelry box—at least it was the one thing that truly intrigued me! The different colored semi-precious stones carved to look like little beetles, each with an odd character carved into the reverse side—so cool!

Years ago I wrote a blog post (in 2012) with a little tutorial on how to make a pendant necklace with a scarab bead, and later in 2016 I wrote another little tutorial for how to make a bracelet with a scarab bead, but since then, scarab beads have been hard to find. 

You can get them on Etsy but they are mostly cabs and not beads. Plus, when I'm looking for something in particular, I tend to have a concrete vision in my mind of exactly how I want it to look—the size, the color, and so on. Oftentimes it's difficult to find exactly what you're envisioning!

Here are two types that I came across on Amazon (affiliate links):


Enter my big container of cabs. One day the idea just struck me: why not try to make my own scarabs?


Yes! That is the answer! Of course I will! And how much fun it will be!


So I collected what tools I had in my workshop that I thought would do the trick and got out my big container of inexpensive cabochons that I had collected over the years. 


I found that the scarabs were incredibly easy to create—with a little bit of a learning curve, of course, but I #1 had fun and #2 now had scarabs! Check out the video on my YouTube channel to see exactly how I did it. Maybe you will want to try your hand at making scarabs too! And enjoy the rest of your weekend! Hurry up spring! 
Laura

PS - My brand new (and 3rd) jewelry making book will be released in April - stay tuned!


You might also like:


Article copyright ©Laura Beth Love 2023 and may not be republished in print or other media without express written permission from the author. For any link updates or corrections leave correct info in comment area

Sunday, February 6, 2022

10 Things I Love About Jewelry Making


So what is it about jewelry making that makes it so great anyway? What is all the fuss about?

Well where do I begin? 

Jewelry making has so much to offer—much more than most people realize! And the world of jewelry making is wide and vast. 


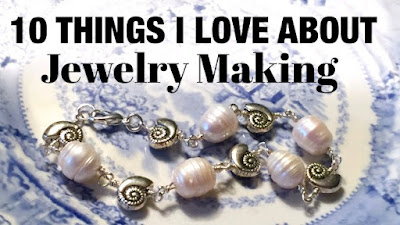
In my newest YouTube video I share with you 10 Things I Love About Jewelry Making, and I bet you can't guess what they are! 

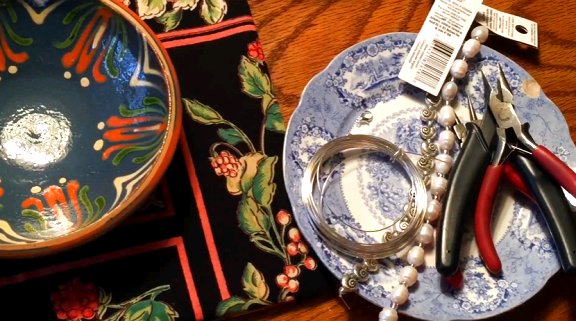
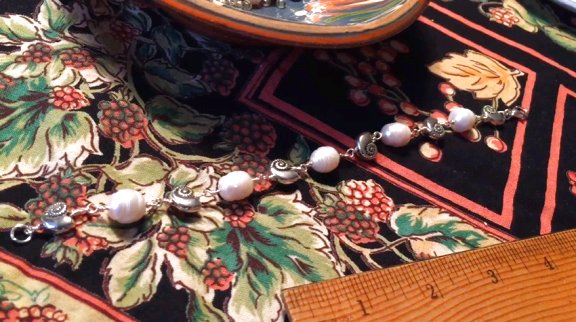
Watch and listen as I put together this pearl and silver shell bead bracelet, and see how easy jewelry making can be. Who knows, maybe you'll be inspired to create something too!


Check out the video and be sure to leave a comment after you watch, and let me know what your favorite things about jewelry making are.


Pin this post! 


You might also like:


Article copyright ©Laura Beth Love 2022 and may not be republished in print or other media without express written permission from the author. For any link updates or corrections leave correct info in comment area

Thursday, January 21, 2021

Melting Glass In Your Microwave: Fun With Microwave Kilns

There comes a time after the busy holiday season each year when my jewelry making comes to rest. I know somewhere in this blog I've written about it before. It's a time when all the hustle and bustle is over and done with and artists and craftspeople can take a deep breath and enjoy the slower pace that the New Year brings. 

Over the years I've found that this is a really special time of year for me. It's when I peek out from my jewelry-making cave, take a deep breath of fresh air and then think to myself, "what's next?!"

It's a time when I not only need a break from making the same type of jewelry that I make over and over again, but it's also a time to un-pop the cork and allow my creativity to travel in an entirely new direction. I look forward to it every year.  

But what's really special about this little "vacation" time of year is that I will usually invest in an entirely new art or craft venture. I try out something that is entirely new to me, that I always wanted to try. The outcome of these ventures varies. Sometimes I find something that I really enjoy, and so I continue to do it (watercolor painting being one), while other times those new supplies or equipment get put on the back burner. But the best times are when I learn something new and then in some way, incorporate that into my everyday art. 

One year I bought a tabletop mini-kiln for enameling, and the basic supplies to go with. I learned about frit and stringers and having to enamel the reverse sides of pieces. I learned that you can enamel on pennies! 

One year I tried out Batik. Another year, polymer clay. Yet another year, liquid resin. Then watercolor paints and acrylics. There've been others too -- and off the top of my head I don't remember what -- but when the pandemic began last spring, I decided to once again try something that I always wanted to try but just didn't have the time for: fusing glass in a microwave kiln. 

You mean you can melt glass in a microwave?

Like the microwave in your kitchen? 

Yes, that's right! I was so curious about how this worked, so I did a bit of research, and I was quickly sold on the idea of making my very own mini melted glass masterpieces in my Sharp Carousel. The best part about it? The ENTIRE setup (not including the microwave, of course) was under $75.00 USD. 

Now, with a bit of research and reading the first thing that you will learn is that you need to use an old, extra microwave with a turntable (hello thrift store) and not your good kitchen microwave. You also want to read as much as you can about how it is done and watch YouTube videos as well. 

Another thing you will learn is that you can't just use any old glass in a microwave kiln. You must use glasses that are compatible in that they have the same COE (coefficients of thermal expansion, re: they have to expand at same rate or will break later on down the road). It might sound a bit confusing at first but it actually is very simple. 

Anyway, aside from all that technical stuff, the whole point of this blog post is just to give you a peek at what came in my microwave kiln kit and show you the first project that I made. 


The photo above is what came in my kit - I think I paid around $65.00 + tax, and once I had it in my hands I was super-impressed by all that it came with and the quality of the items. I also did a lot of browsing the 'net before I picked out my microwave kiln and I found that lots of different places sell them but for the most part, they are pretty much all the same aside from what size you choose. I chose the XL version and was glad that I did, since that allows me to create larger things like ornaments and coasters and not just small items. 

It's also important to have safety equipment first and foremost. You need to have a heat-proof surface to set your kiln on when you remove it from the microwave, such as fireproof bricks, as it will be extremely hot (well over 1,000 degrees Fahrenheit), and you will need heat proof gloves and eye protection and of course a fire extinguisher in case of emergency. You also should use your microwave kiln for melting glass in a ventilated area such as a basement or garage. 

You can see what my kiln came with in the photo above: the kiln itself (it's two-part, with a base and a lid), safety gloves, different kinds of glass, a glass cutter, some jewelry findings, a file, and kiln shelf paper that you MUST use beneath your glass or it will melt to the kiln and your kiln will be ruined. There was even millefiori and dichroic glass included in my kit! 

It was now time to make my first project....


For my first project I cut some thin strips of green and yellow glass and carefully sandwiched the pieces right up against each other (steady hand needed!) then I placed three white and yellow flower patterned millefiori glass pieces on top and let 'er rip. 

After about 5 minutes in my mighty microwave kiln I had my finished fused glass cabochon, seen here:


I loved how it turned out! I was quickly sold on the entire concept of microwave kilns for fusing and melting glass. It's fast, fun, inexpensive, and just so cool! 


I hope you enjoyed this quick look into what a microwave kiln is and let me know, have you ever used one? What type of art or craft do you do in you "down time?"


You might also like:


Article copyright Laura Beth Love 2021 and may not be republished in print or other media without express written permission from the author. For any link updates or corrections leave correct info in comment area. 

Sunday, February 23, 2020

Organic Style Copper Jewelry Bezels - Step By Step Video Tutorial


I'm so happy to be able to share a brand new step by step jewelry tutorial with you! 

I am just crazy about these beautiful organic style copper jewelry bezels and I was so excited to create a DIY tutorial for you so that you can make them too! 

There's something about the warm tones of copper and the imperfect, "organic" style of jewelry that is crafted completely by hand that I just love. 

These bezels can be filled with all types of goodies - think resin with embedded beads, bits of vintage fabric or glass, stones or gems or even paper. What would you fill them with? Well maybe I am getting ahead of myself because we have to create them first! But the great news is that even though they may look difficult to make, they really are quite easy.

All you will need are a few simple, basic tools and materials, and a small butane torch. If you have only ever made soldered jewelry with a soldering iron, this is the perfect project for you to learn how to solder with a small torch. If you've never used a torch before, never fear! It's easy and not scary at all, I promise! 

Below are a few photos from the tutorial, but you can watch the entire video for free on my YouTube channel!


Enjoy the tutorial and I'd love to know how your bezels turn out, so be sure to leave me a comment on the video on YouTube - or any questions you may have as well - and don't forget to subscribe!

Oh, and be sure to check back for my next video, where we will transform these bezels into completely unique, one of a kind pieces of jewelry!


Pin this post!


What do you think? 

Have a great week!
Laura

Join me on: 


Article copyright ©Laura Beth Love 2020 and may not be republished in print or other media without express written permission from the author. For any link corrections please leave correct info in comment area.