Showing posts with label homemade bread. Show all posts

Thursday, January 20, 2022

Make It At Home: Garlic Naan Bread - Easy Recipe!

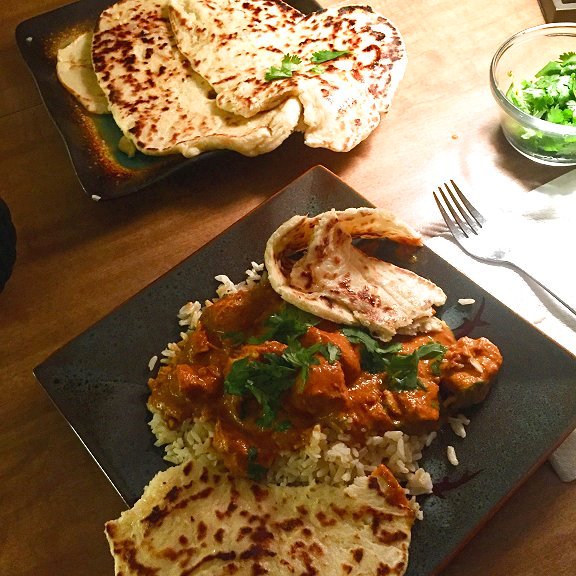
If you love to make homemade Indian food at home but don't make your own naan bread then I'm sure you already know this fact: Grocery store naan is expensive! But did you know that it's very easy to make homemade naan that is so much more delicious than store bought? Plus, it doesn't include any preservatives or additives that some commercial brands contain. We make this recipe all the time and it is a crowd pleaser through and through. PS - if you're not a garlic fan, feel free to skip adding it to the dough, but I think that's what makes this recipe the best!

Ingredients
For Dough:
1 teaspoon active dry yeast (rapid rise or regular)
1/2 cup of very warm water about 105 degrees F (hot but not boiling hot)
1 Tablespoon granulated white sugar
1/2 teaspoon salt
2 Tablespoons butter or ghee
2 cloves of garlic, put through a garlic press or crushed/minced  
1/2 egg, well beaten
2 Tablespoons milk
1 3/4 cups all purpose flour (plus more for surface)

For Garlic Butter:
2 1/2 Tablespoons butter or ghee
2 cloves of garlic, put through a garlic press or crushed/minced  

For Garnish:
Fresh cilantro leaves (optional)

Directions:
In a medium sized bowl add warm water, yeast, and sugar. Set aside for five minutes to allow the yeast to activate. 


Then add:
1/2 of a beaten egg
1/2 teaspoon salt
2 Tablespoons melted butter
2 cloves of garlic, crushed/minced
2 Tablespoons milk

Mix thoroughly with a wire whisk.


Next add:
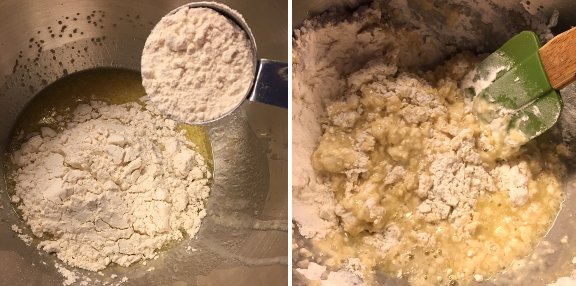
1 3/4 cups all purpose flour to the liquid mixture.
Mix with spatula until all ingredients are combined and a soft dough is formed. Dough should be soft and pliable but not overly sticky. If it is too sticky (when you touch it and it sticks to your finger like glue) add a bit more flour - try adding one additional Tablespoon of flour and mix well. Add more if needed but be careful to not add too much because you want to keep the dough soft.


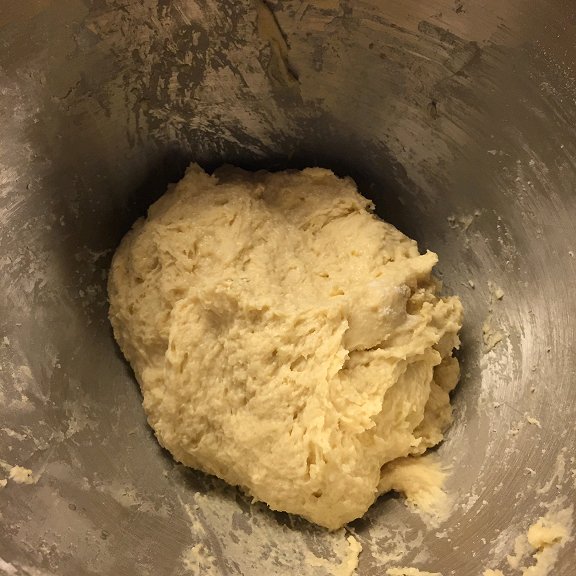
Cover bowl with plastic wrap and allow to rise in a warm spot for about an hour. I like to turn my empty oven on for just two minutes and then turn it off, and then let the dough rise in the very slightly warm oven while it is turned off.

Once dough has risen, remove the dough from bowl and turn onto a lightly floured surface. 

Divide the dough into 6 equally sized pieces. I use a large butcher knife to cut my ball of dough in half equally. Then I cut each half into three equally sized pieces, so there are six total. The knife makes it easy to create the equally sized portions. Gently shape each piece of dough into a ball shape. Place balls on lightly floured cookie sheet. Cover dough balls with a linen towel and allow to rise for another 45 minutes. 

While the dough is rising prepare the garlic butter. (below)


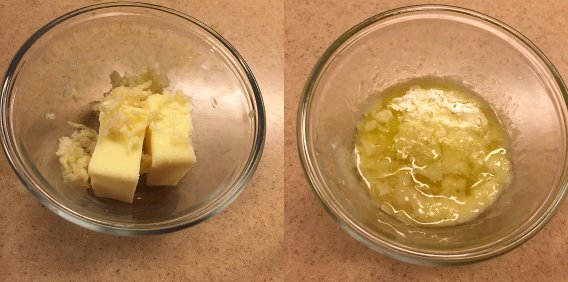
To prepare the garlic butter:
In a small microwave-safe bowl add:
2 cloves of garlic, crushed
2 1/2 Tablespoons butter
Cook garlic with butter in the microwave for 20 to 30 seconds to melt butter. Allow to sit in microwave until after you are finished making the bread.


Once dough balls have risen/expanded in size, use a floured rolling pin and roll each ball once or twice to create an elongated oval shape. Do not roll too thin. Try to keep the thickness less than 1/4 of an inch, closer to 1/8".  


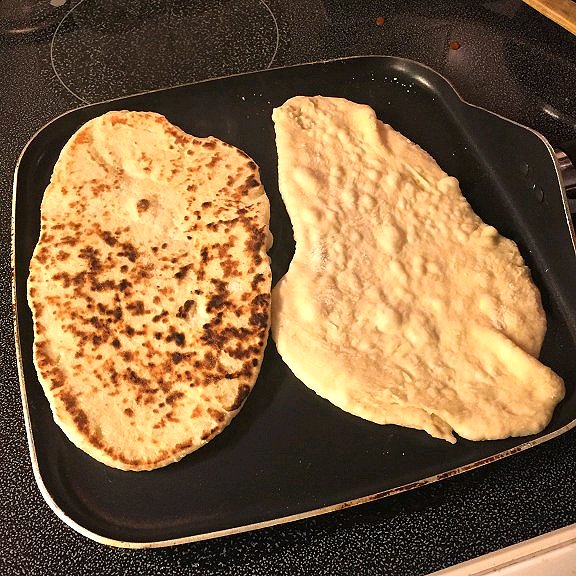
Heat skillet or pancake pan (what I use) on medium heat and carefully place breads on pan, one or two at a time depending on the space you have. Breads will cook quickly, usually in under one minute for the first side. It is ready to flip when the bread starts to brown and then char a bit. Use tongs or a spatula to flip to other side and allow to cook other side until bread starts to char. (Note: If the flour on the pan or the charring starts to create a bit of smoke be sure to use your stove's vent fan.) Remove bread from pan and place on a large plate, repeating the process until all breads are cooked. 


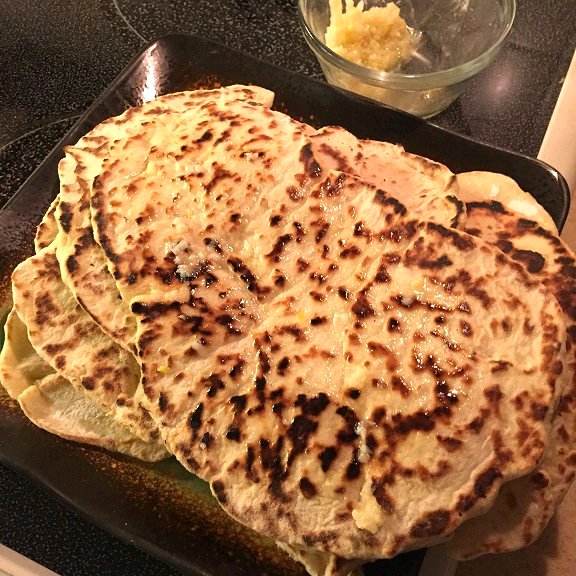
Once all breads are "baked" and on a plate, reheat the garlic butter by warming it for 10-15 seconds in the microwave, being careful not to overheat it.

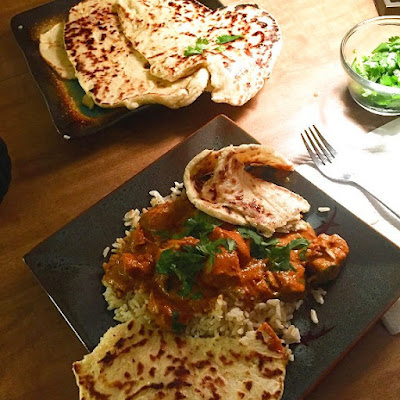
Use a pastry brush to brush the top of each naan with garlic butter. Sprinkle with fresh cilantro if desired. Cover dish with aluminum foil until ready to serve.


Serve with your favorite curry, like our Butter Chicken shown above. That's all there is to it! Enjoy!


Article copyright ©Laura Beth Love 2022 and may not be republished in print or other media without express written permission from the author. For any link updates or corrections leave correct info in comment area. 

Monday, June 24, 2019

How To Make Homemade Bagels


I think most people don't realize how fun and easy it is to make  your own homemade bagels. It's not something I do all the time, since hello carbs, but when I do make a batch at home they disappear very quickly! 

Nothing compares to a hot and fresh homemade bagel. The outsides are golden and crisp, and the insides are soft and chewy. Add whatever flavors you like by way of herbs and seasonings to personalize them to your own tastes and the end result is perfection! Follow along and make a batch yourself. I'd love to hear how yours turned out so be sure to leave a comment below and let me know what your favorite type is. 

For this recipe I'll show you how to make Everything Bagels, which, like the title says, is basically a mix of all the classic bagel seasonings: salt, sesame seed, garlic, onion, and poppy seed. A lot of people don't realize that bagels are boiled - and you can't skip this step! After they are boiled, toppings are added and then they are baked. Let's get started!

Here are all of the things you will need to make this recipe:
Flour (bread flour if you have it)
Very warm water
Salt (regular and/or coarse/Kosher salt)
Active dry yeast
Brown sugar (light or dark)
Honey
One egg
Seasonings: poppy seeds, sesame seeds, garlic powder, onion powder
Cooking oil - any kind

Wire whisk
Large pot of boiling water
Large slotted serving spoon
Cookie sheet or baking pan covered with parchment paper
Pastry brush (if you have one)
Tea towel for draining bagels on, non-fuzzy kind is best

For the dough you will need:

1 & 1/2 cups very warm water
3 teaspoons active dry yeast (can use quick rise)
4 cups flour
1 & 1/2 Tablespoons brown sugar (light or dark)
1 teaspoon salt

Directions for dough:

Combine the water, yeast and sugar in your mixing bowl, mix with a whisk or fork to combine, then cover and allow to sit for five minutes. (I use a heavy duty stand mixer with a dough hook attachment to make my dough but you can mix it by hand if you like.)

After allowing to rest for five minutes add the flour and mix well to completely combine the dry and wet ingredients.

Optional step: At this point you can add some of your toppings to the dough, or not. I added about a teaspoon of poppy seeds into my dough mixture at this point, but this was mostly just for looks.

Knead the dough on a lightly floured surface - be careful not to add too much extra flour to your dough because as with any baking, that will make your dough too hard and your finished result too tough. Knead for about five minutes. 

Add about one tablespoon of cooking oil to a large bowl (again, I use a bowl from my mixer) and coat the inside of the bowl with the oil. I use my hand to do this. Place the dough in the bowl and then flip the dough over so that both sides are covered with oil. Cover the bowl with a piece of plastic wrap (so that the dough does not dry out) and then cover with a tea towel (to keep it nice and dark so it can rise in privacy.) Allow the dough to rise for about an hour to one and a half hours, or until it looks like it has close to doubled in size. It doesn't have to be exact. 

While the dough is rising:

Line a large cookie sheet or baking pan with parchment paper and set aside. 

Ready your egg wash:
In a separate bowl whisk together one raw egg with two tablespoons water and set aside. You will coat each bagel with the egg wash before you dip the top of the bagel into the seasonings. Keep the tea towel nearby.


Ready your bagel toppings:

In the wide-mouth bowl combine:
4 Tablespoons sesame seeds
4 Tablespoons poppy seeds
1 Tablespoon garlic powder or dried minced garlic
1 Tablespoon onion powder or dried minced onion
1 to 2 teaspoons coarse salt

Ready the boiling water:
Bring a large soup pot full of water to boil. Add a few tablespoons of honey to the pot if you have it on hand. (4 tablespoons or so is fine. Traditionally barley malt syrup is used in place of honey so if you have that you can use 4 T of that instead of the honey.)


Here is my bagel dough, ready to shape into rings, along with my mixed topping of poppy seeds, salt, garlic and onion salt, and sesame seeds.


Once your dough has risen you will now punch it down and make it into a smooth ball that you will divide into about 8 separate pieces. I used a butcher knife to divide mine like a pizza so that my sections were relatively the same size. Each section will be one bagel. One or two of the sections I cut in half to turn it into two small bagels instead of one large one, but the large ones are better to make. 


Roll each section of dough into a ball and then make a hole in the center with your finger, shaping into a ring or bagel shape. If you prefer, you can roll each section of dough into a snake shape and then connect the ends to form the bagel shape. Why not try both ways and see which you prefer?

Once you shape each dough section into a bagel shape, set them on the parchment covered cookie sheet while you get ready to boil them. The photos above and below show my raw, unboiled bagels waiting for the water to boil.


Once your water boils, carefully and gently place a bagel into the pot using your slotted spoon. Do not drop them into the pot or you might splash yourself with boiling water. I boiled only three bagels at a time so that they had enough room to move around a bit. Use the spoon to turn them over in the pot so that they cook on both sides. They will puff up! These big bagels make my big soup pot look small! Boil each bagel for about one to one and a half minutes on each side.

Have your tea towel ready on a counter close by to set them on when you take them out of the pot. Be careful! They will be slippery and boiling hot! Repeat this process until all of the bagels are boiled and on your towel and then turn off the burner. 

Preheat your oven to 425 degrees F


Now your bagels will be sitting on your tea towel ready to get coated with egg wash and toppings. Allow the bagels to cool off for a few moments so that they are easier to handle. Be careful not to burn yourself, they will be hot! 

If you have one, use a pastry brush to brush the egg wash on the top of each bagel. 


Once you have brushed the top of a bagel with egg wash, carefully dip the top of the bagel into the bowl of seasonings, coating the tops of the bagels. 

Then set the bagel onto the parchment covered cookie sheet. Repeat this process until all of your bagels are coated and on the cookie sheet. 


These bagels are coated with egg wash and seasonings and ready to bake.


You can see in the photo above where I made four smaller bagels instead of making eight large bagels. I liked the large ones better and won't make the smaller ones again!

Once your oven is preheated, bake the bagels for about 20 to 25 minutes, watching them closely as they bake. Allow them to turn golden brown and then remove from oven to cool.


If you have one, a cooling rack is nice to have for cooling the bagels. Allow them to set for ten to fifteen minutes before devouring them.


These bagels turned out perfect! The first time I made them I added much too much salt to the tops and we had to scrape much of it off. I learned by doing, and now only use 1 to 2 teaspoons of salt in my topping. 


Once completely cooled, store in an airtight container for up to two days, or freeze.

Slice lengthwise, toast them if you like,  and serve with your favorite accompaniments: butter, cream cheese, or turn into a yummy sandwich with a fried egg, avocado, cheese, your favorite lunch meats or veggies or whatever you fancy. Save one for me!


Have a great week!
Laura

Join me on: 


Article copyright ©Laura Beth Love 2019 and may not be republished in print or other media without express written permission from the author. 

Wednesday, November 21, 2012

Baking Homemade Baguettes - Baguette Recipe

One of the most comforting foods in autumn and winter is fresh homemade bread. French Baguettes, to be exact. Crusty on the outside, light and airy on the inside, warm out of the oven...there's just not one bad thing about that, no matter how you look at it!

I don't often write about food on my blog, but today, when I decided to make baguettes, I had the idea to take some photos along the way so I could share with you how it's done, or at least how I do it. 


I love to bake. I enjoy cooking, yes, but I come from a family of women who bake.  You've got a baby shower, wedding, or funeral, you say? We bake. I couldn't tell you how to use a bread machine or how to make those popular fancy cupcakes with elaborate decorative icing designs, but I have the world's best recipes for kiffles, nut bread, cakes, and pies. 


Baguettes have a crispy crust and light interior and are the perfect accompaniment for winter soups and stews. They also make great sub sandwiches.  My favorite way to enjoy them though, is simply warm out of the oven with butter. 


There are plenty of baguette recipes to be found in cookbooks and across the internet, but I have found that the basic recipe for baguettes does not have too many variations. Most baguette recipes are very similar. I will often try a few different recipes until I find one that  I like, and then adjust it here and there to suit my tastes. 


The basic ingredients for baguettes are flour, salt, dry yeast, and water. 


I also like to sprinkle a little bit of sea salt or course salt onto my baguettes right before 
I pop them into the oven.


French Baguettes

One package of active dry yeast (about 2 & 1/2 teaspoons)
1 & 1/4 cups of warm water
1/2 teaspoon sugar
3 & 1/2 cups flour
1 & 1/2 teaspoons salt 

1. In a measuring cup, stir the yeast into the warm water until completely dissolved. Add the sugar and stir. Set aside for five minutes to allow the yeast to activate. 


2. Mix flour and salt in a mixing bowl and create a well in the center of the flour.


3. Pour the yeast mixture into the flour.


4. Gently stir the flour into the liquid (just a few times) to create a paste. Cover and allow to rise/activate for 15 minutes. 

5. Mix thoroughly (I use an electric mixer) until a sticky soft dough is formed. Add additional water (a few Tablespoons) while mixing if needed. 

6. Place dough in a clean bowl, cover, and allow to rise for 90 minutes. 

7. Punch down, then cover again and allow to rise for another hour. 


8. Place dough on a floured surface and slice into two pieces. Gently shape into two loaves. 


9. Place loaves on a lightly floured baking sheet. 


10. Cover the loaves and allow them to rise for about 45 minutes. 

11. Preheat oven to 475 degrees F. 


12. Place a pan of water on a lower oven rack. The steam from the water will help the baguettes form a crispy crust.


13. Before baking, slash the tops of the loaves with a knife. I sprinkle my loaves with a little bit of sea salt before baking them. This is optional.


14. Bake for 20 minutes or until lightly golden. 


15. Remove from the baking pan and cool on a wire rack.


These loaves turned out a little bigger than I would have liked. I probably should have made them into three loaves instead of two! Maybe next time, I will try that instead.  Either way, they were delicious! 


What do you think?


I hope you have a great week! 
Laura

Join me on: 


Article copyright ©Laura Beth Love 2021 and may not be republished in print or other media without express written permission from the author. For any link corrections please leave correct info in comment area.