Showing posts with label organizing. Show all posts

Tuesday, August 23, 2022

How To Price Your Handmade Jewelry (AND My New Jewelry Supply Book Now Available!)


Hey Jewelry Making Friends! 

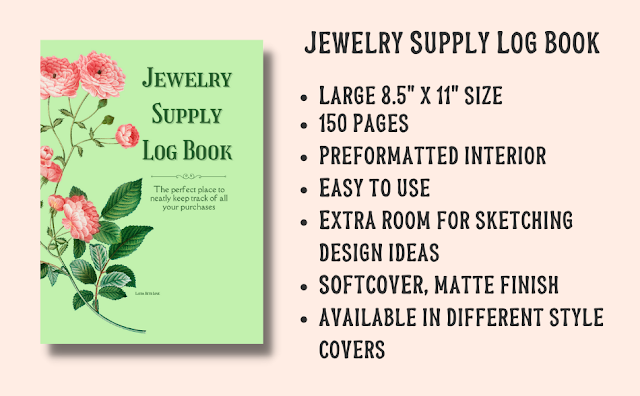
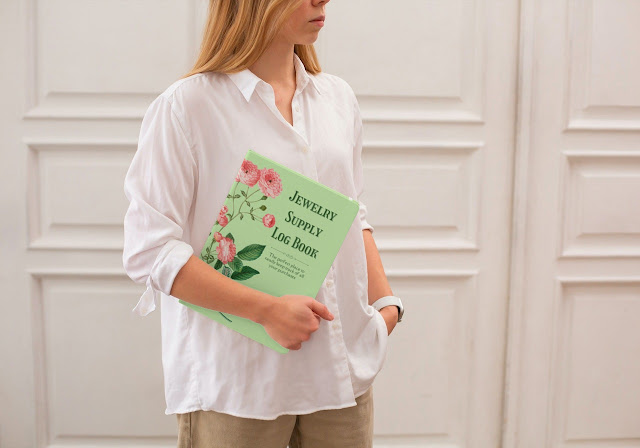
It's finally here! My brand new book: Jewelry Supply Log Book is now available for purchase on Amazon and I am going to tell you why you are going to LOVE this brand new book.

It's so important to stay organized. When you begin your journey into the world of jewelry making, you can quickly get caught up in a storm of beads, components, finding, wire, chain, and all sorts of little parts - some of which you may not even be completely sure what they are for (at least not in the beginning when you are just starting out.)

Beads by themselves are mesmerizing - and stones too - and boy, do they start to pile up once you start buying a strand here and a strand there. Most of us start with plastic bead boxes with small compartments to store our beads. One bead box quickly turns into two, then two turn into four, then four to eight...you get the picture. 

And that's great! Having a place to organize and store your beads and jewelry supplies is the smart first step to take. 

But I can PROMISE you, a little bit down the road, once you have gotten full-force into creating jewelry, there will come a day when you search your bead box for a particular bead or component...and you will find that you have only one, or even none, left. THIS is that point in time that I am talking about. 

Trust me, you will rack your brain trying to remember where you bought them, how much you paid, even exactly what they were!  

In one of my recent YouTube videos I showed you how I organize my beads and jewelry making supplies (here's the link if you missed it) and one thing I point out in the video is that when I fill a compartment in my bead box with beads I also stick the tag from the packaging into the same compartment with the beads, so when I need to order more I know where I got them from.


That is smart move number two! It only takes a moment to do and you will thank yourself down the road. But that's only PART of it. When you get to the point that you are SELLING your jewelry, it's then time to take your organization up a notch! Now, if you know about jewelry making and selling your handmade jewelry, then you probably already know that there is a formula that you should be using to price your jewelry. 

I see so many people either overpricing or underpricing their jewelry - and in both cases, they are doing themselves a great disservice! When you do this you are over-valuing and/or under-valuing your jewelry, and basically cheating yourself. 

I always say that I can always tell when someone is too attached to the things they make and they do not really want to sell them - the prices are usually very high for what the item is. Or they could just have a convoluted view of the value of what they are making. Underpricing your jewelry is just as bad. When you add up the price of the beads and components that you put into a piece and then account for your time spent making it, and then price it very low - you may as well just give it away for free, because you aren't going to make any profit. 

Now. There is a learning curve when you start making jewelry that has to be accounted for in your pricing. When you are just learning and starting out and want to sell your jewelry, you will not get as much as you would for pieces that you sell later on when you have perfected your skills and techniques. That's just how it is - and that's how it should be. That's just something to keep in mind. 

And I will add, I too am guilty of not using the jewelry pricing formula at times, and I regret it. I would rather spend my time creating things than doing bookwork and accounting LOL. 
I never really bothered to keep track of what I paid for beads - both inexpensive and expensive. Sure I keep records and receipts for my business and for taxes, etc. But they are gathered in a box and once I bring the beads or supplies home and remove the packaging and organize them into my bead box, the receipt goes into a box on a shelf until tax time. 

For a while I had a small notebook where I tried to keep track of the beads and supplies I owned. When I'd get busy it was easy to skip writing things down and keeping track of things. Some folks suggest creating a spreadsheet or some type of log on their computer to keep track of supplies, but that's typing in data and I much prefer writing things down the romantic, old fashioned way with a pen and book! Of course my sketchbook is an entity within itself, and is full of drawings and ideas but that's about it. I thought long and hard about what I needed, what I wanted, what would work best for me, what my ideal way of keeping track and organizing all of my beads, findings, and jewelry making supplies would be. 

And so I created this book. 

I formatted this book with great thought and care, and even designed the cover myself. 

I just love it. Each separate page is for logging or recording a certain individual bead or supply item, and the pages are all preformatted, so all you have to do is fill in the blanks. Each entry has spaces for things like: where you bought it and when, color, size/dimensions, how many pieces came in a package or on a strand, the price paid for the package/strand, and most importantly - once you divide the number of pieces that came in the package into the price you paid for the entire package - the price PER PIECE. 

This is an essential thing to know so that you can price your jewelry properly. 

Example: 
Let's say you purchase a strand of beads that contains 30 beads and you paid $17.00 USD for the strand. 

$17.00 ÷ 30 beads = $0.56 per bead.   


By keeping track of and recording this information you can price your jewelry much more appropriately than just guessing and making up a price. 

This book has spaces where you can fill in all of that information, but here is my favorite part: I created a space below each item entry where you can sketch design ideas or jot down notes! 


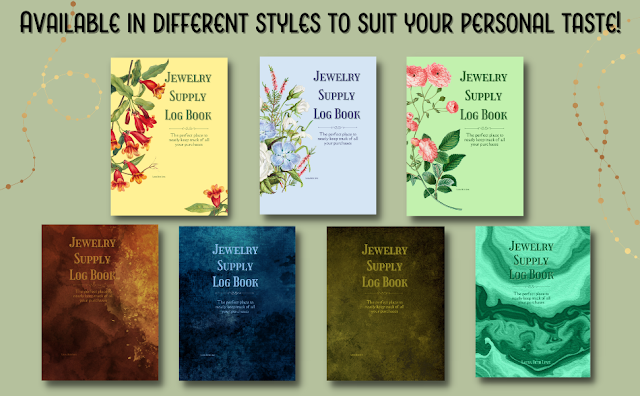
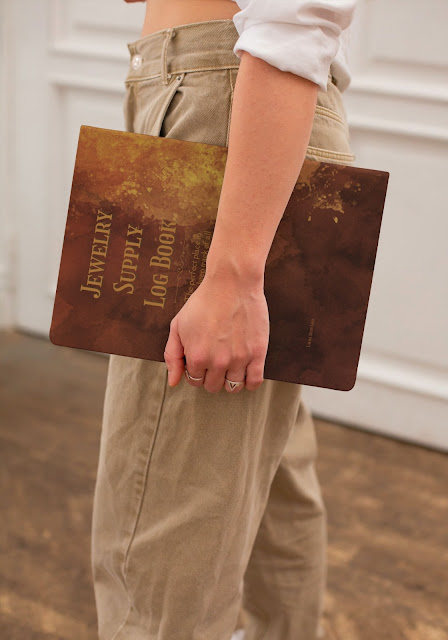
I created this book in different covers so you can choose one that suits your own personal tastes. Check them out on Amazon and don't forget to order early for Christmas! Check them out below!

Friday, February 9, 2018

How To Organize Your Beads For Jewelry Making

When you first start jewelry making and beading, one of the first things you will discover is that you need storage for your beads and jewelry components! I think it's really important to be organized from the get go—it's a real pain to try and organize in a particular way if in the beginning you just lump all of your beads together, so start out by thinking about how you would like your beads organized, and then follow through with that. 

In this blog post I am going to share with you how I organize some of my own beads and components for jewelry making. Everyone has their own ways of doing things. The following are the things that worked best for me, but by all means, do what works best for you!

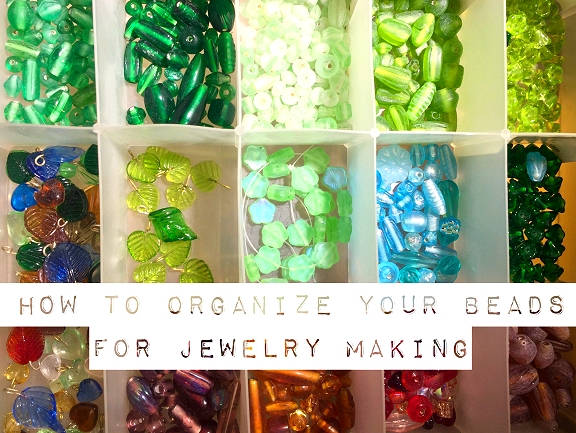
I organize my beads in a few different ways. First off, I organize by color. This is especially helpful for jewelry making, because obviously you are going to be creating things that most often are color-coordinated, so it makes sense to have all different shades of, say, green - together so that you can see the differences in hues and shades and tones, all in one box. Doing it this way makes it easy to pick just the right color. 

I also organize my beads by material. I most often use beads that are stone and glass. I have a lot of stone beads, and I have a lot of glass beads. Sometimes I mix these different material beads in one project, but most often I create something that is strictly all gemstone/stone, or all glass. 

That being said, I have one set of boxes that are all stone beads, and another set of boxes that are all glass beads. Both sets of boxes are arranged by color. I have one specific box for each color or color family.

I use standard plastic bead boxes that I bought years ago at a craft store - I think it was either Michael's or ACMoore, and I think they came in packs of 2 or 3 or 4—I forget—but my point is that you do not need anything fancy or expensive to store your beads in. The containers I use each have about 17 separate pockets for beads, which stores plenty per box.


I keep most of my boxes stacked in an old bookcase, which works great since it allows me to keep them at eye level and easy to reach. 

Here you can see a few of the examples of my organization by color family. I have one box for pinks & reds, one for yellows & oranges, one for browns & earth tones, etc. 


I also have boxes for different types of metal beads and different finishes. There are sterling silver, silver plated, copper, vintage silver, etc. 


I keep special rows of boxes that contain the things that I use most often. This makes it easy to grab them without searching. Things like pearls, clasps, sterling silver components and Swarovski crystals—I box the crystals by size...one box for 6mm, one for 4mm, etc.  


Here's a peek into one of my blue stone boxes. I have a few blue boxes—one for turquoise shades, one for true blues, one for greenish-blues, etc.


Here's one of my yellows & oranges boxes, where I store things like amber, carnelian, and citrine. 


Here's one of my pearl boxes - I try to organize them by size and shape. I peel the sticker labels off of the bags that they arrive in from the supplier, and stick those labels into the box sections with the beads. This makes it easy to see the sizes at a glimpse, and makes it easy to reorder them if needed.


Here you can see that I saved the bead-strand tags and put them in with the beads. It can be easy to forget what stone is what! Keeping the prices with the beads is essential to determining how to price your finished jewelry. Just how much did you pay for those beads? How much for the strand? How many were on the strand? How much does that come to per bead?


Here is the same photo showing the reverse sides of the tags. Here it tells you info such as: how many beads were on the strand, the name of the stone, whether it was treated (dyed, hardened, etc), and a brief description of shape and or size.


I like to keep metal components in small plastic bags to deter tarnishing, which is oxidation of the metal from it's exposure to air. 

 Here is a box of my glass beads, greens with a few other colors. 

I love green.


I keep many other supplies in these photo boxes that you can buy at most craft stores (I think I bought mine at ACMoore.) These are great for storing wire, chain, jump rings, and headpins—things I buy a lot of.


And finally, no matter how organized I keep my supplies, my workspace usually looks like this! 

I hope you enjoyed this peek into my bead storage and organization and hopefully you were able to take away a good hint or two for organizing your own beads and jewelry making supplies! Happy jewelry making! 


Pin this post! 


Have a great week!
 Laura


Article, images, and designs copyright ©Laura Beth Love for Dishfunctional Designs™ 2018
all rights reserved

Friday, June 9, 2017

DIY Tiered Jewelry Organizer Made From Vintage China Plates & Teacups


Today I'm going to show you how you can turn your thrift store and flea market teacups, plates, and saucers into a pretty tiered organizer. This organizer is great for holding jewelry or other small collections, makes a unique candy dish, and is certainly a conversation piece. All you need are a few supplies. It's easier than you might think! 

Assemble your supplies
First, let's gather our supplies. For this project you will need a variety of old plates, saucers, and teacups. You will need a tube of E6000 adhesive. This is available at hardware stores, department stores such as Target, and even in some grocery stores. Due to the materials we will be gluing, I do not recommend using any other adhesive. Hot glue will not work, nor will water-soluble school glue, so get yourself a tube of E6000. 


You will need a disposable popsicle stick or craft stick to help spread the glue, and you will need some old newspaper to cover and protect your tabletop while you work. 

A paper plate or a piece of waxed paper comes in handy when you need to set your glue-covered craft stick down, so you may want to keep one of those at your workstation too. And remember, when using any type of adhesive, always be sure to work in a well-ventilated area.


Choosing your china
For the organizer we are going to make today, you will need three plates and three teacups. From the bottom up, our organizer will look like this: plate, teacup, plate, teacup, plate, teacup.

To keep your tiered organizer from being top-heavy and toppling over, we need to build our organizer so that the largest and heaviest plates and cups are on the bottom, and the smaller and lighter ones are on the top. Think about this when you are choosing your china. 


Before we glue any of our pieces together, we will first pick them out and stack them up so we can see how our finished project will  look.

First, choose a heavy plate for the bottom so that your organizer has a sturdy base. Remember, we are going to be stacking china on top of this plate, so it has to be large and heavy so that your "china tower" does not topple over. Once you have chosen your base plate, set it aside and choose your first teacup that will be glued to the top of that plate. This teacup will be glued upside-down to the bottom plate. This is because the diameter of the cup's opening is (most likely) larger than the diameter of the bottom of the cup. 


Once you have chosen your first cup, set it aside next to your base plate and then choose your middle plate. This plate will be glued on top of the bottom of the teacup that you just chose. Make sure you choose a plate that has a smaller diameter than your base plate. Your middle plate should also be lighter than your base plate. Once you have chosen that plate, try it out to see how it looks stacked up and then set it aside. 

Note: if using elongated plates, you can either line them up or stagger them, as shown in the photos below:


Plates lined up with each other. 


Plates staggered.


Next, choose your second tea cup. This cup will be glued upside-down on top of the middle plate that you just chose. 


Once you have chosen your second teacup, choose your third plate. This plate will be situated on top of the bottom of the teacup that you just chose. Choose the smallest and lightest plate for this position. A saucer often works great for this position. 


Finally, you will choose your third and last teacup to complete your china tower. This teacup will be glued right-side-up on top of the small plate or saucer that you last chose. 


Now that you have all of your china picked out and you know what is going where, it's time to glue them together! Before you glue, make sure all pieces are clean and dry. We will glue them together from the bottom up.

 Open your adhesive and carefully apply a ring of glue around the rim of the first (bottom) teacup, and then place the teacup, glue-side down onto the top center of your bottom plate.


Now - it is up to you whether you want to continue gluing right away, or wait until those two pieces have dried. I recommend allowing them to dry overnight before adding the next piece. Either way, next you will glue the center plate to the bottom of the bottom cup, allow that to dry, and then add your second cup  - once again upside-down, and once that is dry add your small plate, and then your final top cup, which you will glue to the small plate right-side-up. 

Another option is to forgo the top teacup and use the small plate as your top tier. It's a matter of personal taste. Do what you think looks best. Below are two different ways of stacking elongated plates - lined up or staggered.


Staggered elongated plates


I hope you enjoyed this tutorial! Please share this post with your friends and remember, I always love to see your creations so feel free to email them to me via my Etsy shop or  on my Facebook page (links in the right hand sidebar).


What do you think?


You might also like: 


Have a great week!
Laura

Article and images copyright ©Laura Beth Love 2017 and may not be republished in print or other media without express written permission from the author.

Thursday, April 19, 2012

Organizing & Decorating With Clipboards!


Decorating and organizing has never been easier than it is with 

- you guessed it - clipboards! Why clipboards?  
They are:
Inexpensive - they cost next to nothing
Easy to acquire - available at any office supply store
Simple to decorate (and they make great gifts for teachers and coaches)
Easy to hang & display
A great way to help you and your family stay organized!

Check out these creative examples of clipboard wall displays and altered and personalized clip boards. 


Decoupage with fabric or paper


Decoupaged with papers and an old sewing pattern envelope

Painted clip boards


Use clipboards to display necklaces


Clipboards as a display for vintage family photos hits the mark: great farmhouse style decorating


A contemporary wall display with painted clipboards


Wallpaper embellished clipboards 


Image Detail

Entry clipboard wall display holds artwork


Clipboard wall at Anthropologie


Vintage sign photos displayed on clipboards


Use clipboards as a mood board, or to display projects and inspiration.


Clipboards as a hallway display


In black and white


Use clipboards to display drawings or other artwork


Use clipboards to display vintage illustrations or old book pages


These mini clipboards hold chore lists and allowance. Make one for everyone in the house.


Pictures hung using clipboards

A pretty way to display your children's photos from 4InspirationsPhotography


 Button decorated clipboard (above and below) from Petite Michelle Louise


Clipboard + chalkboard paint = awesome! from BHG


What would you do with yours?


Pin this post!    


Which do you like best?


Have a great week!
Laura


Join me on: 


Article copyright ©Laura Beth Love 2019 and may not be republished in print or other media without express written permission from the author. For any link corrections please leave correct info in comment area.