Showing posts with label how to make a turkey. Show all posts

Thursday, December 1, 2022

This What Happens If You Roast Your Turkey Upside-down


It started off like any other Thursday...except it didn't, because this was Thanksgiving Thursday and I had been defrosting this nearly 22-pound beast of a gobbler on a broiler pan in my fridge since the previous Sunday. 

After nearly five days of hogging up the best shelf in the fridge, it was finally time to get it into the oven to roast! I double-checked the weight and then double-checked the roasting chart (which said 4 to 4 1/2 hours at 325° F.)

I readied its bed.


Sheets of foil precisely folded and pieced together atop a broiler pan (previously sprayed with non-stick cooking spray) 
and covered with a nest of diced fresh celery and onion - awaited.
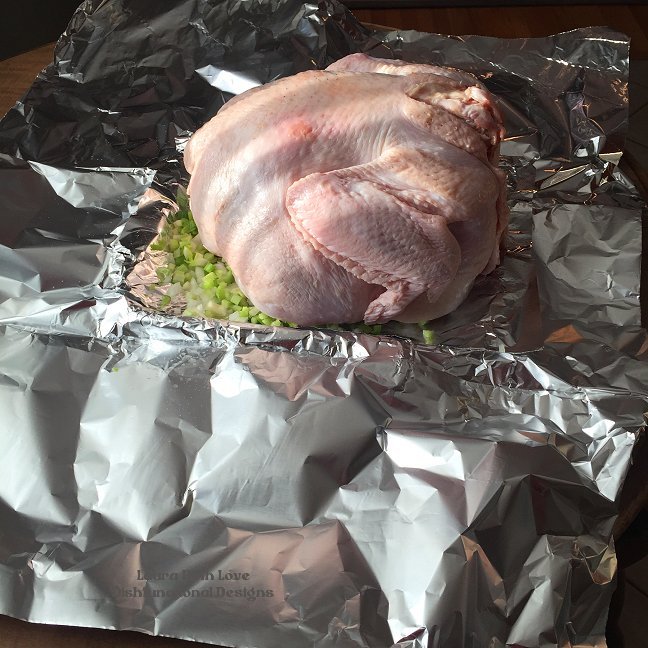

There was a heave, and then a ho, as I hoisted the fowl with tremendous strength and then placed it with great precision onto its bed. 

Wait, wait! I need to salt the insides, then melt some butter to spread throughout! With my eyes constantly on the wall's timepiece, I calculated carefully the hours and minutes to and from the hearth—I mean oven. 

Alright, so wrapped up it went in for four and a half, and I opened the foil for the last hour or so to achieve the golden-brown hue.

Finally, the time had come. One last great heave-ho and out of the oven it went. 

It was beautiful. I let it rest for ten minutes while I began to greet my guests. 

Then I commenced the carve. 

The meat carved with a bit of difficulty. Perplexed, I continued. The meat was dark. I continued to cut. Where was the white meat? Now not only perplexed but now also concerned, I stepped back from my endeavor. Where is the white meat where is the white meat why is this so difficult...I glanced once more at the carving guide (which I usually never bother with as I just take it from oven, rest, and then just carve) but... 

I look from the guide to the bird and from the bird to the guide and read as the guide says, "locate the drumstick and pull" I look and look, and then a moment of pure confusion engulfs me as I stand there feeling lost and small, unable to find the drumsticks. Something just wasn't right. 

And then the realization struck me. 

In the hustle and rush of the morning, I had mistakenly roasted my turkey upside down!  

(In case you missed it the first time - this turkey is upside-down)
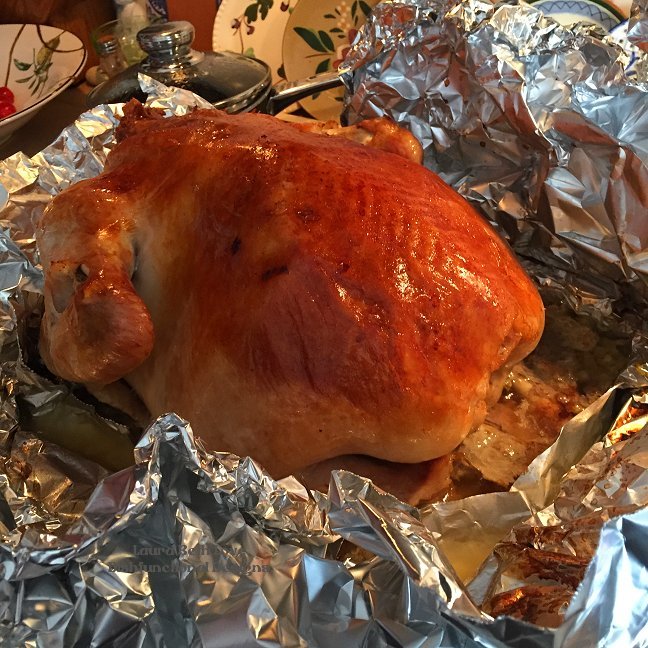
I was supposed to roast it breast-side up, but in my rush to get it into the oven on time, I didn't bother to check its position and was just happy to have it roasting away while I prepared the rest of the dinner. 

Now my daughters and I stood there staring at the steaming bird and wondering, how were we going to flip it back over? It was burning hot and heavy. But with extra hands waiting, I just grabbed the bird and gave it a big turn onto its other side.

Glistening juicy turkey breast awaited. It sliced more perfectly than ever before, falling off of the bird with ease. 

A short while later at the dinner table my guests gushed over the turkey - it was perfect,  they said, the best they had ever had...juicy and tender and perfect!
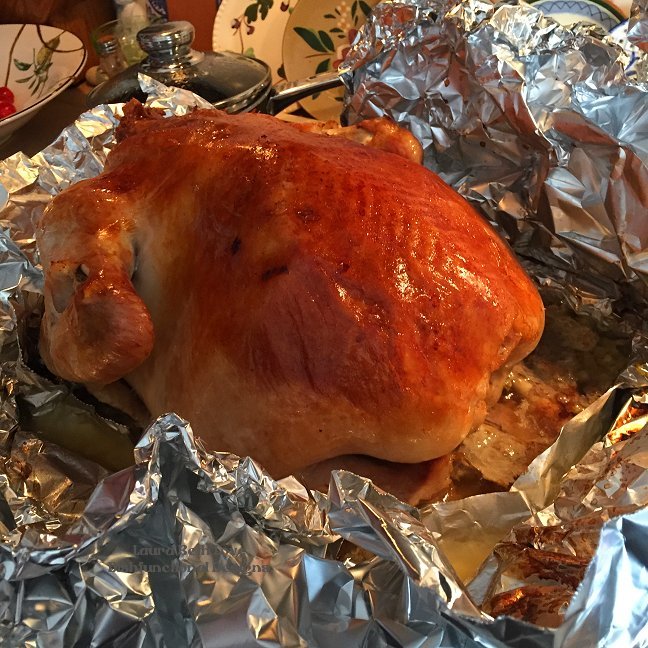


It was perfect. They were right. And I came to realize that I hadn't made a mistake at all, but just accidentally came to learn the correct way to roast a turkey! I highly recommend you try it too!

Happy Holidays! 
Laura

Pin this post!


You might also like: 


Have a great week!
Laura

Article and images copyright ©Laura Beth Love 2022 and may not be republished in print or other media without express written permission from the author. As an Amazon Influencer, I earn from quaifying purchases.

Friday, December 4, 2020

How To Roast A Turkey


If you've never made a turkey before you're in the right place...

The first thing I will tell you about making a turkey is that if you are making a frozen one, you will need to defrost it in your refrigerator for a few days before you make it! So first things first, read any and all labels on your turkey before you remove the packaging. I like to grab my camera and snap a pic of the directions that are on the plastic outer wrapping of the turkey and also the tag that shows the weight of my turkey. This is just so later when I am figuring out how many hours to bake it, I don't have to dig in the trash for the label (hey, we've all been there!). 

So get that turkey in the fridge and on a pan so it can defrost. I usually put mine on a broiler pan in the fridge in case of any leakage. Use whatever pan you have that fits in your fridge and has a raised edge.

When you are ready to bake your turkey the first thing you should do is get the pan ready for the turkey, since once you open the packaging, you're gonna need to get that turkey on the pan pretty fast. 

I use the bottom section of a broiler pan to bake my turkey, but first I wrap the turkey in foil by creating a bag out of foil. Sound confusing? Trust me, it's not. My mother taught me how to do this years ago. Here are step-by-step instructions for how to make your turkey.

1) Spray your pan with cooking spray to help make cleanup easy.


2) Cut two long sections of foil, trying to make them the same length. I made mine about 2 & 1/2 times the length of my pan. Place the pieces of foil on top of each other, lining them up so the long edges meet.

3) Next, holding both sheets of foil together, make a 1/2" fold along the entire long length of one of the long edges of the foil, pressing it down as you go to make a flat seam. Then fold that 1/2" section over once more and press it down to create a tight, neat fold. You want to try to seal the foil edges together as tight as you can because you are creating a leak-proof bag.


4) Next, open the foil up by lifting the top sheet of foil.


5) Once you open the foil it should look like this. Try to keep it as neat as possible.

6) Next center your foil over your pan. Now you have a nice bag to bake your turkey in! 


7) Dice up one medium size onion and two washed stalks of celery. 

8) Lay a smaller, third piece of foil that is as long as the length of your pan over the seam of the bag (optional, but I do it for an easier cleanup) and place the onion and celery on the pan. Your turkey will cook on top of the onion and celery and that is how you get the best, most flavorful drippings for gravy.


The turkey I made in these photos was 15 1/2 pounds

9) Open your turkey in a clean sink or basin and rinse with cold water. Remove the bag containing the gizzards and the neck from inside the bird. I discard them, but you can use those for your stuffing or gravy if you like. 

Lightly salt the inside of the turkey and then place the turkey breast side up on the pan on top of the onion and celery. If you want you can truss the legs of the turkey together with baking twine. This turkey came with a plastic truss on the legs that you do not have to remove and can bake in the oven.


10) Melt 3 tablespoons of butter and pour or rub that over the  turkey. 


11) Next, bring the sides of the foil up on all sides of the turkey to create a packet, or bag. Bring the edges of the foil together on the top of the turkey and fold over to create a seal. It does not have to be sealed very tightly. This type of bag is not leak-proof, but it certainly is a great way to roast a turkey and helps tremendously with cleanup.

12) Preheat your oven to 325° Fahrenheit and bake your turkey according to the directions on the packaging. The directions will look similar to these below. Follow directions on your package for roasting temperature. Final internal roasting temperature should be 185°.

Roasting temperature 325° Fahrenheit

Roasting times:

8-12 pound turkey for 2.75 - 4 hours

12-16 pound turkey for 4-5 hours

16-20 pound turkey for 5-6 hours

20-24 pound turkey for 6-7 hours

24-30 pound turkey for 7-8 hours

HEADS UP: If you are making a very heavy turkey you might need someone to help you to get it into and out of the oven!


After the first hour or two of cooking you can open the top of the foil and use a turkey baster to transfer some of the juices from the bottom of the pan and pour them over the top of the turkey. Then just fold the foil back over the turkey and continue to bake.


13) Open the top of the foil for the last 45 minutes of baking to brown the turkey. Once finished, allow to rest before carving. 


14) To make gravy, use a small pot to melt 2 tablespoons of butter. Add a heaping tablespoon of flour and whisk together well. Then add the broth from below the turkey by using the turkey baster to transfer the juice along with the cooked onion and celery into the pot and whisk together over medium high heat until it begins to simmer and then turn it down to low. Once it thickens, turn the stove off.  

That's all there is to it! Enjoy & happy baking!


 See my new printables!


You might also like: 


Have a great week!
Laura

Article and images copyright ©Laura Beth Love 2020 and may not be republished in print or other media without express written permission from the author. As an Amazon Influencer, I earn from quaifying purchases.