Last week I shared my paper mache mushroom YouTube video and today I'm sharing the step-by-step tutorial here in readable blog format.
This is a step-by-step DIY tutorial for how you can make beautiful paper-mache mushrooms. They are great for the holidays or any time of year and I bet you'll be surprised how easy and inexpensive they are to make. As a matter of fact, I make many of the shapes while I'm relaxing at night watching Netflix.
All you need for this craft is a few basic supplies and a little time. Make some for yourself as decorations or as gifts for friends and family - they will love them.
Materials & where to find them:
(*These links are to the products that I used in this video. I am not sponsored by any of these products, they are just products that I used and like. These are affiliate links.)
~ Old newspaper or magazine pages
~ Masking tape: https://amzn.to/3doKB8t
~ White acrylic craft paint: https://amzn.to/3pqHdji
~ Red acrylic craft paint: https://amzn.to/3y9VyEN
~ Craft paint brushes: https://amzn.to/3Dlc2Lb
~ Eye screws, extra small sized: https://amzn.to/31zhjRP
~ Fishing line: https://amzn.to/3xUJF5c
To make the paper mache:
(watch video for how-to make)
~ All purpose flour: https://amzn.to/31APYit
~ Salt: https://amzn.to/3lDkK15
Here is what you will need for the paper mache mixture:
- 1/2 cup all purpose flour
- 1 Tablespoon salt
- 1/2 cup warm water (+ more as needed)
Directions
Form the mushrooms: Use newspaper or magazine pages to shape into mushroom caps and stems by folding, rolling, or scrunching the paper into the desired shape. Use strips of masking tape to help keep the newspaper shapes in place. Cover all areas of paper on mushroom stem and cap with masking tape. Connect the stem to the mushroom cap with masking tape adding more tape until it is secure.
Check that the entire mushroom is covered with masking tape, as seen below.
In a medium sized bowl mix: 1/2 cup all purpose flour, 1 Tablespoon of salt, and 1/2 cup of warm water. Mix until completely combined and no lumps are present. It should be about the consistency of
thin pancake batter. If it is too thick, add more water one tablespoon at a time until desired consistency is met and then mix well. Tear many strips of newspaper or magazine pages and assemble at your workstation.
To apply the paper mache, dip each strip of newspaper into the flour mixture, one or two at a time, and then use your fingers to remove excess mixture from the paper. It should be completely coated but not dripping wet.
Next apply the coated newspaper strips to your mushroom one strip at a time.
Continue this process applying the coated newspaper strips to your mushroom until the entire mushroom is coated with newspaper or magazine strips. Be sure to cover ALL masking tape!
Inspect it carefully and use your fingers to smooth down any pointy edges and to remove any big globs of paper mache mixture.
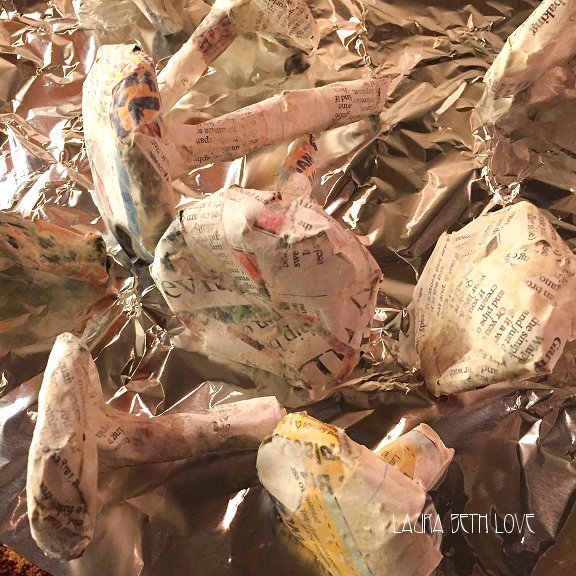
Place your mushrooms on aluminum foil or wax paper and allow to dry for about 24 hours or until completely dry. They should be solid and one hundred percent dry. You can put them on a foil covered cookie sheet and bake them in the oven at a very low temperature for about an hour to help speed up the process. Set the oven for about 125 degrees Fahrenheit and watch carefully, turning them every 15 minutes or so. Do not leave unattended and do not turn the oven any hotter.
Once they are completely dry they will look like this:
Use a craft paint brush to apply white acrylic paint to the entire mushroom, cap and stem.
Set painted mushrooms aside and allow to dry completely.
Next use a paintbrush to apply red paint around the rim of the mushroom cap, going over all the edges but leaving the underside of the mushroom cap white.
Then fill in the rest of the top of the mushroom cap with red paint. Set aside and allow to completely dry.
Use a small paintbrush to apply white dots to your mushroom cap. Set aside and allow to completely dry.
You can use lots of crumpled newspaper or magazine pages to make different shaped mushroom caps!
To hang, use a small eye-screw and screw it into the center top of the mushroom cap. It helps to pierce the cap with a pin to start a hole before you screw it in. Add a piece of fishing line to hang.
You can use these to decorate your home, tree, or to give as gifts!
You might also like:

Article copyright ©Laura Beth Love 2021 and may not be republished in print or other media without express written permission from the author. For any link updates or corrections leave correct info in comment area


