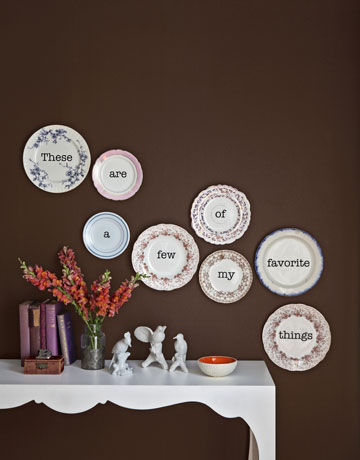
This project was actually created out of my need for signage for my new art studio at the Banana Factory in Bethlehem, PA! Having lots of great wall space to fill, I needed a way to display my name on my wall so that when folks visited my studio they could get an idea of who I am and what I do. I'm never one to go the traditional route, so I didn't want to use standard printed signage. Instead, I put my brain into creative overdrive and created my own unique signage by working with what I'm most familiar with: plates! I love how they turned out!
I thought I'd share with you how I created these word plates in case you'd like to create your own. Just imagine the word possibilities that you could create with these! You could spell out anything that you could imagine and hang them anywhere in your home.
A few ideas: EAT or DINE (for the kitchen), RELAX or DREAM (for the bedroom), FAMILY or HOME (for the living room or family room). You get the idea!
This really is a great DIY home decor project that costs next to nothing (and its fun!)
Check it out!

My finished letter plates, ready for hanging! This entire project only cost me $6.00!
Materials Needed
A collection of old plates, all similar in size
Black Sharpie marker
Large sized paper clips (you will need one for each plate)
E6000 adhesive
Toothpick or craft stick to apply adhesive
Paper plate (to rest the adhesive on while you are working)
Vinyl stick on letters (the repositionable type)
Instructions
1. The first thing you have to do is collect a bunch of different pattered plates. I used dinner- sized plates which were all similar in size. Each was about 8" across (20.3 cm) give or take an inch or so. They do not all have to be exactly the same size, just close in size. I thought the large sized plates packed a punch and made a nice impact, so I went with those. You could also use smaller plates if you prefer. Just make sure the plates that you choose are all around the same size. It just looks better that way!
Where to get plates: thrift shops, yard sales, flea markets, friends and family. These are the best places to find plates. You want to have a variety of different plates, so start collecting them now and stash them away until you have a nice selection. How about sharing this project idea with a friend? That way, you can give each other your duplicate plates (since you will often find a few of the same pattern for sale at one time.) Once you have your plates, wash them in warm soapy water and dry them, making sure they are very clean.

Repositionable vinyl peel off letters. These are the bomb!
2. The next thing you are going to do is get your paws on some repositionable vinyl letters. These are sold in different sizes. The size you will use will be determined by the size
plates you are using, so you will want to collect your plates first and then purchase your vinyl letters afterward. I used the 4" (10.2 cm) vinyl letters. These are available from craft stores, some hardware stores, as well as online. I bought mine at Dick Blick Art Supply because that was closest to where I live.
One pack of the vinyl letters cost meabout $6.00, and I thought that was a bargain! I was lucky that I only had to buy onepackage of letters. Depending on what you are going to spell out, you may need to buy more than one package, so plan ahead! There are only so many of each letter included in
a package. For example, the character count of letters in the package that I bought was
as follows: A-2, B-1, C-1, D-2, E-3, F-1, etc., so check the package!
Before you apply the letters, lay all of your plates out on a large tabletop and turn them until you are pleased with the positions of the patterns on the plates. Position the plates
on your table top in the same order that you would like them hung on your wall. Next, carefully peel off your first vinyl letter and starting with the top of the letter, position it on your plate (either centered or not, your choice). Slowly apply the letter to your plate, starting with the top of the letter and working down. Go very slow to make sure you don't get any air bubbles or wrinkles in you letters when you are applying them.
Yes, they are repositionable, but they also stick really well! You do not want to have to reposition them unless it is absolutely necessary! The first time that you apply them is when they have the best adhesion! Once your letter is applied, smooth it out with your fingers and then move on to the next one.

There you have it! Isn't that cool?
3. Once you have all of your letters on your plates you are ready to attach hooks to the reverse side to hang them with. You can buy those wire plate hangers if you prefer, but my way is free! Yay!
Before you attach a hanger on the reverse side of your plate you need to eyeball it and make a marker mark on the reverse side to indicate exactly where you will be gluing the hanger. You want to do this so that your letters will not be crooked when hung on the wall. With one hand, hold your plate in front of you, perfectly centered (facing you), and with your other hand make a small marker mark on the reverse side at the top center edge. Just estimate as best you can where the top center is on the reverse side of your plate. Then draw a line going down the back of the plate from the marker mark that you made towards the center and over the foot (ridge) of the plate. That is the spot where you will glue your hanger.

This line indicates the top center of the plate from the reverse side
4. Open up a large paper clip as shown in the photo below. Use your fingers to bend the paper clip so that it sits relatively flat against your plate. It doesn't have to be perfect, just try to make it flat if you can. I positioned the small end of the paper clip towards the center of the plate so that the large end of the paper clip would serve as the hook for hanging.

I recommend this adhesive. I would NOT recommend using a hot glue gun!
5. Now you are ready to glue the clip to the plate. Use your craft stick or toothpick to apply a thick, generous coating of adhesive to the small end of the paper clip, traveling up towards the hook/large end. Coat the entire small end of the clip to the plate. Do not be stingy with your adhesive! Spread it around the clip with your toothpick or craft stick. Make sure it is really well coated with a nice thick coating of adhesive. *Allow to dry 24 hours or at least overnight.

Clip with dried adhesive
6. All you have to do now is hang them on your wall. I used regular nails to hang mine, but depending on what your wall material is made of (and especially if you are hanging large, heavy plates) you may need to use reinforcements for your nails, such as mollys or anchors. If you are unsure of what type of nail to use, ask for advice at your local hardware store.
That's it!
I hope you enjoyed the tutorial!

What do you think?
What would your plates say?

Have a great week!
Laura
Laura

Join me on:

Article copyright ©Laura Beth Love 2019 and may not be republished in print or other media without express written permission from the author. For any link corrections please leave correct info in comment area. As an Amazon Influencer, I earn from quaifying purchases.