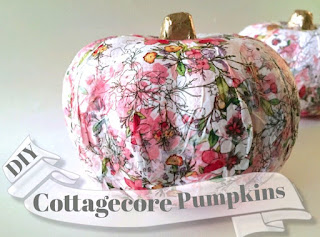
Hey friends! I have a brand new video on my YouTube channel so be sure to check it out!
This craft is not only quick and easy, but it's super inexpensive too, and the final result packs a big punch! So head on over to my YouTube channel and check it out!
Not only are gilded accents completely hot right now in home décor and accessories, but adding a shimmering flash of gold (or silver if you prefer) to your artwork can really make it stand out above the rest and give it a lush, rich feel and look, as well as a flash of elegance.
In my last YouTube video I demonstrated how I create my alcohol ink paintings using beautiful colored alcohol inks and isopropyl alcohol on Yupo paper. If you haven't seen that video you can find it here.
After playing around with alcohol inks and getting a feel for how they work and how to work with them, I was excited to take my alcohol ink paintings to the next step and try out metallic gold alcohol ink!
I thought making a video of my experiment would be a great way to share my findings. The result was my new video tutorial for my YouTube channel, Painting With Metallic Gold Alcohol Ink. I loved the result and I think you will too!
The tools and materials are minimal but the results are amazing! So head on over to my channel and check it out.
Below is a list of the materials I used in the video tutorial.
SUPPLIES USED IN THIS VIDEO:
- Yupo translucent 100% polypropylene paper (you can use Yupo paper with alcohol inks, watercolors, and acrylic paints) For this project I used one half of a sheet of the 9x12" pad (with the light blue cover.) I simply cut the sheet in half with scissors. You can buy this at craft stores and art supply stores.
- Alcohol Inks - For this project I used Ranger alcohol inks in pink, turquoise blue, purple and metallic gold.
- Plastic disposable eyedropper available at craft stores or drug stores.
- Isopropyl alcohol 91% available at drugstores. Use the 91%. The lower percentage such as 70% does not work as well.
- Blue painters tape from a hardware store. You can also use masking tape.
- Aluminum foil (optional) from grocery store.
- Lazy Susan (optional) I purchased from a thrift store.
- Hairdryer
- Heat gun (optional) that I purchased at a craft store.
*Work in a well ventilated area. Using a fan in the room helps to circulate the air.
Article copyright Laura Beth Love 2021 and may not be republished in print or other media without express written permission from the author. For any link updates or corrections leave correct info in comment area.
If you've never painted with alcohol ink, you're missing out!
I just created a brand new video tutorial for my YouTube channel on how to make an alcohol ink painting.
The tools and materials are minimal but the results are amazing! So head on over to my channel and check it out.
Below is a list of the materials I used in the video tutorial.
SUPPLIES USED IN THIS VIDEO:
- Yupo translucent 100% polypropylene paper (you can use Yupo paper with alcohol inks, watercolors, and acrylic paints) For this project I used one half of a sheet of the 9x12" pad (with the light blue cover.) I simply cut the sheet in half with scissors. You can buy this at craft stores and art supply stores.
- Alcohol Inks - For this project I used Ranger alcohol inks in Denim, Sepia, and Oregano.
- Plastic disposable eyedropper available at craft stores or drug stores.
- Isopropyl alcohol 91% (I say 97% in the video but it's 91%) available at drugstores. Use the 91%. The lower percentage such as 70% does not work as well.
- Blue painters tape from a hardware store. You can also use masking tape.
- Aluminum foil (optional) from grocery store.
- Lazy Susan I purchased from a thrift store.
- Hairdryer
- Heat gun that I purchased at a craft store.
*Work in a well ventilated area. Using a fan in the room helps.
Article copyright Laura Beth Love 2021 and may not be republished in print or other media without express written permission from the author. For any link updates or corrections leave correct info in comment area.
If you are not already making your own ear wires for earrings then you need to watch this ear wire tutorial now! Making your own earwires is easier than you might think, and with a little bit of instruction and practice, you will be turning out your own handcrafted earrings in no time at all.
This beginner technique is essential to jewelry making. If you're a complete beginner it may seem a bit daunting at first, but I promise, it's not at all as hard as it might seem. The tools and materials you need are minimal and are basic jewelry making tools that are essential to jewelry making, so once you invest in them you will use them for all sorts of jewelry making techniques and projects.
For this tutorial you will need:
Round nose pliers (sometimes called rosary pliers)
Chain nose pliers
Wire cutters (aka wire cutting pliers)
*Wire straightening pliers
*A ball peen hammer (you can improvise with a different hammer you have at home if you do not yet own a ball peen hammer)
*A steel bench block (another thing you can improvise on if you do not yet own one)
A ruler
24 gauge wire
*A note on the tools:
The round nose pliers and wire cutters are essential tools but you can easily improvise with a different hammer if you do not yet own a ball peen hammer.
Same goes for the steel bench block; you can hammer on another hard surface until you acquire a bench block.
The wire straightening pliers are a great tool to have and really are useful, so if you do not have a pair, put them on your list to get in the future, as they will make working with wire SO much easier and will make your work look much more professional, but you do not need them to learn how to make earwires.
For this video tutorial, I used 24 gauge sterling silver wire but when you are just starting out and learning you should use inexpensive craft wire or copper wire (you can buy both at most craft stores and watch for those coupons!) Save the expensive precious metal wire for when you perfect your techniques and practice on the inexpensive stuff!
Did you know that you can also buy copper wire in many different gauges at your local hardware store? Check it out the next time you visit, and take note of the prices. When I first started out with jewelry making and wire work, I bought myself a wire stripper and a few spools of different gauge wire at my local Home Depot and paid only a fraction of the cost that jewelry catalogs charged for wire.
The wire that I bought was plastic coated, so the wire strippers were essential to easily removing the plastic coating from the wire. Be careful though, those buggers are sharp!
Check out the tutorial video below, or watch it directly from my YouTube channel.
Enjoy the tutorial and I'd love to know how your ear wires turn out, so be sure to leave me a comment below and on the video on YouTube and don't forget to subscribe!