Showing posts with label comfort food. Show all posts

Wednesday, October 13, 2021

Wednesday Comfort Food Recipe: Easy Chicken Paprikash


With my daughter coming home from college tomorrow for the first time since she went away in August, the homecooked meal requests started rolling in weeks ahead of time! 

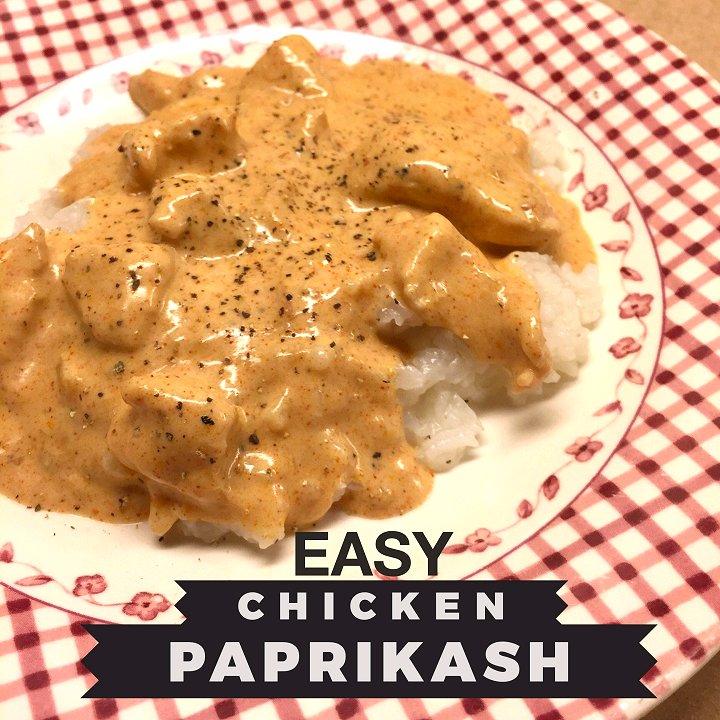
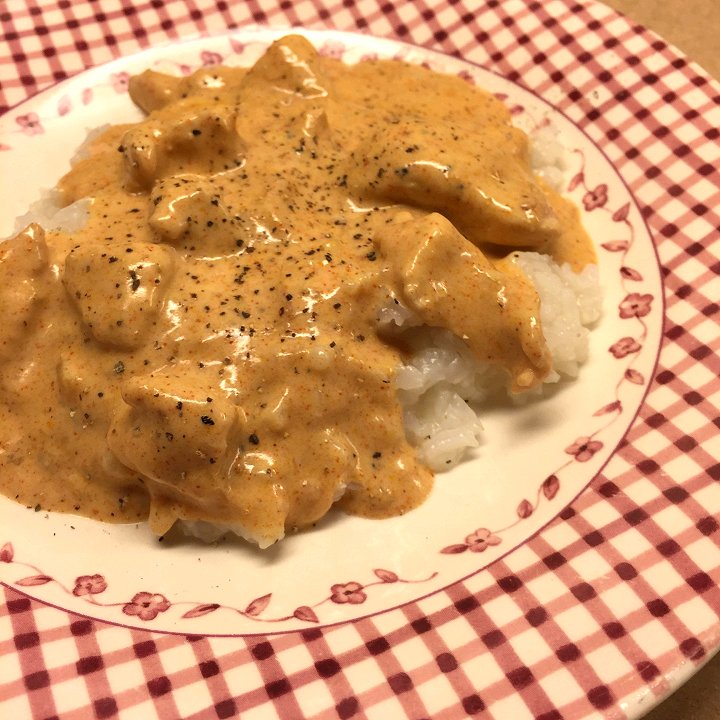
My (quick and easy) chicken paprikash was first on the list and figured while I cooked up a batch for her I might as well share the recipe here as well. This recipe is easy enough for a beginner and only calls for a few ingredients. Even better, you can prepare it a day ahead of time since it thickens overnight and tastes even better the next day!

You will need:
1 medium onion
1 1/2 Tablespoons butter
2 boneless chicken breasts (1 & 1/2 to 2 cups uncooked)
1 cup chicken stock or chicken broth
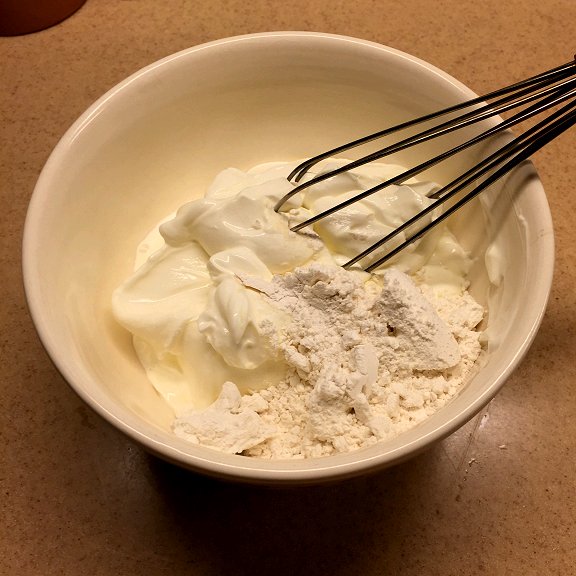
16oz container Sour Cream (you will use less)
2 heaping Tablespoons flour
1 Tablespoon cold water
1 Tablespoon Paprika
Fresh ground black pepper
1 teaspoon kosher salt
Prepared rice, mashed potatoes or egg noodles for serving.

Directions:

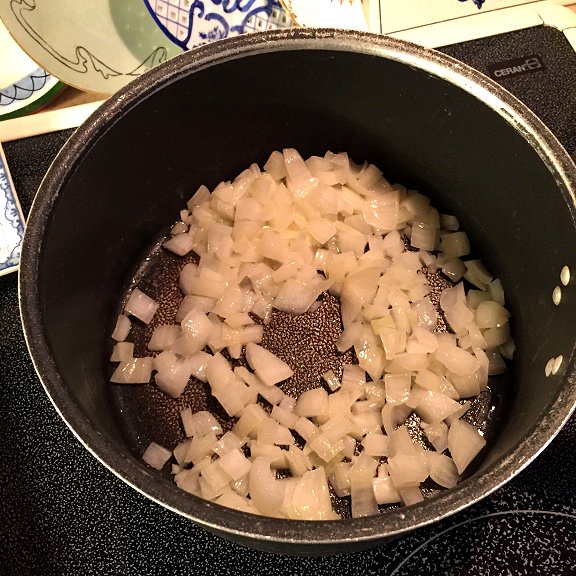
Melt the butter in a medium saucepan and add the copped onion, cooking on low while you prep the chicken.

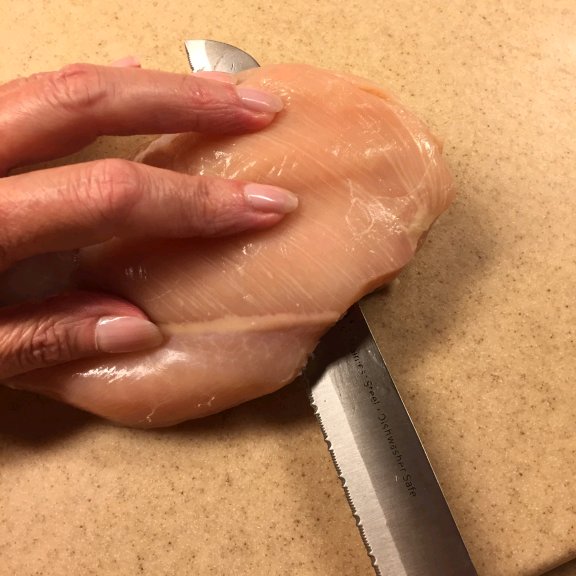
Use a serrated knife to butterfly slice your chicken breasts through the center creating two thin pieces. Do this with both chicken breasts.

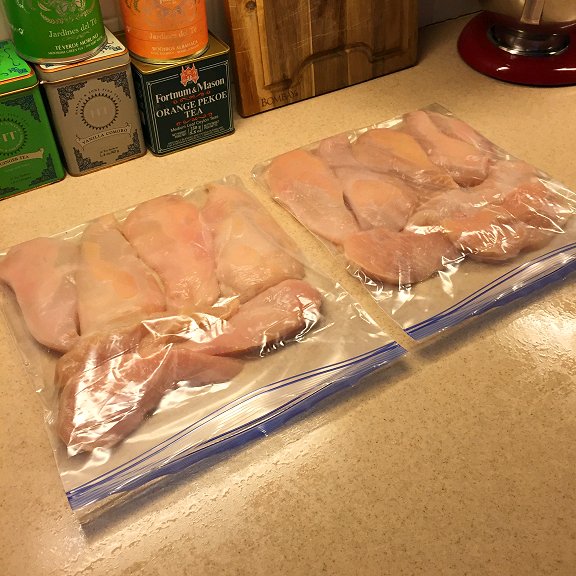
Note: I buy my chicken in the large family packs, so when I am going to make a recipe I clean and prep the entire package of chicken at one time. Then I set aside what I need for the recipe and freeze whatever is left. I'll show you how I do that too.

After you cut one breast and separate the pieces, this is what it will look like.

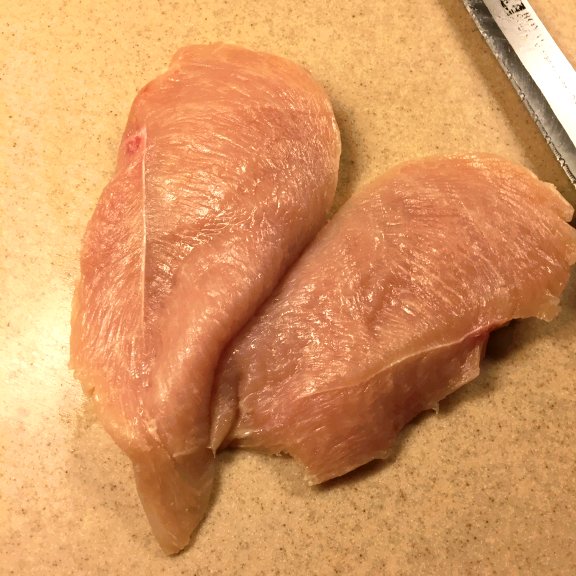
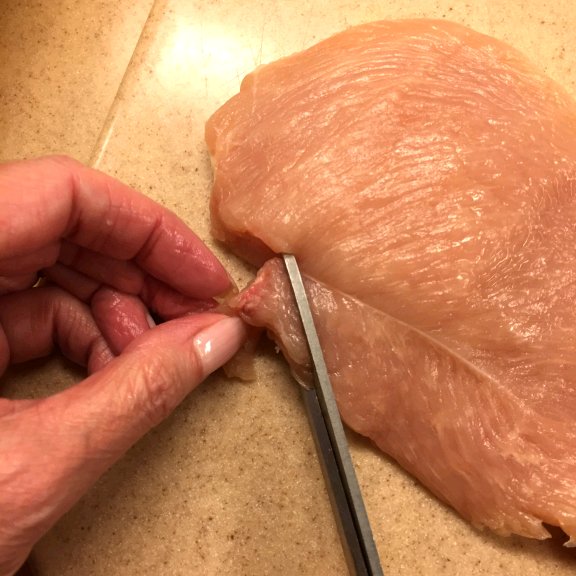
If you like, you can cut the tendon or any fatty or cartilage out with kitchen scissors and discard

Here is what it looked like once I butterflied and cleaned the entire family-sized pack of chicken! I will set a few pieces aside (about 1 & 1/2 to 2 cups) for my paprikash and bag the rest for the freezer. Family packs save you a lot of money and are worth the little bit of work! 

Note: I always use the smaller pieces to cut up for the recipe and freeze the nicer filets for a later recipe when I want larger pieces such as for chicken Parmesan or Marsala.

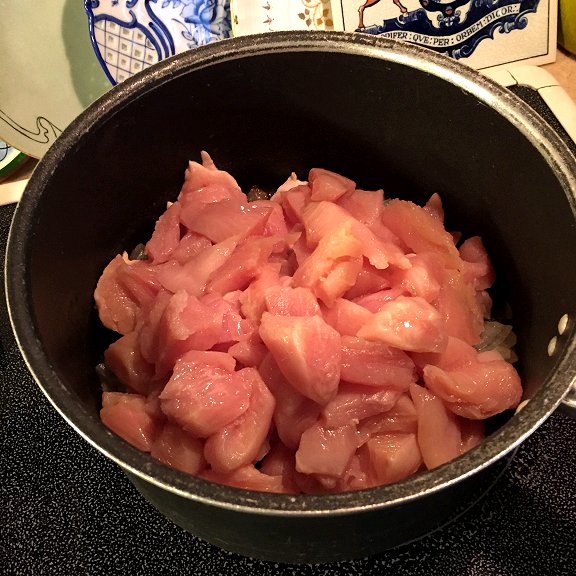
Use your kitchen scissors (or knife) to cut the chicken into one to two-inch sized pieces and add to the onion and butter mixture.

Here is what I did with the rest of the cleaned chicken: I put it in one flat layer in freezer bags, sealed, and then put into another bag and then into my freezer for use at a later date.

Cook the chicken & onion on medium heat until cooked though, stirring occasionally. If a lot of moisture comes out of your chicken you can pour some away if you like. I do this. 
Next add 1 cup of chicken broth to the chicken.


Put a little bit more than 3/4 of your sour cream into a bowl and then add the 2 Tablespoons of four. Add one Tablespoon of water and mix well with a whisk until all lumps are gone and the flour is completely combined with the sour cream. Then pour the sour cream mixture into the pot with your chicken and stir to combine.

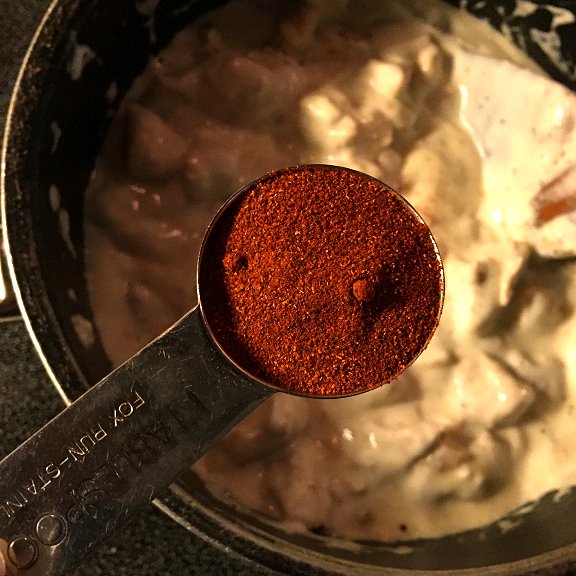
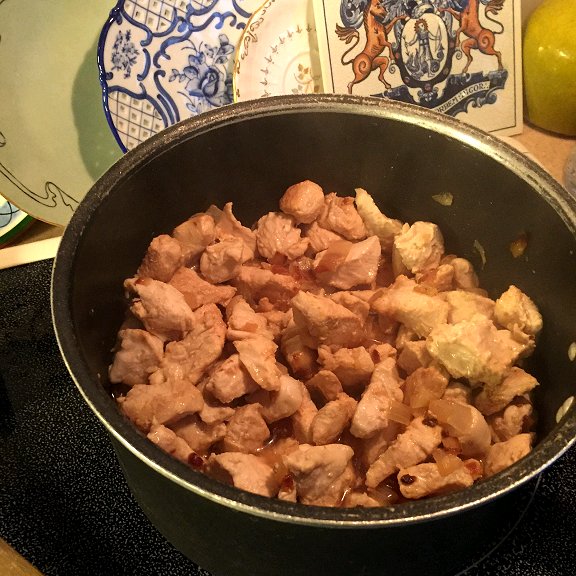
Next add one Tablespoon of paprika and mix well.

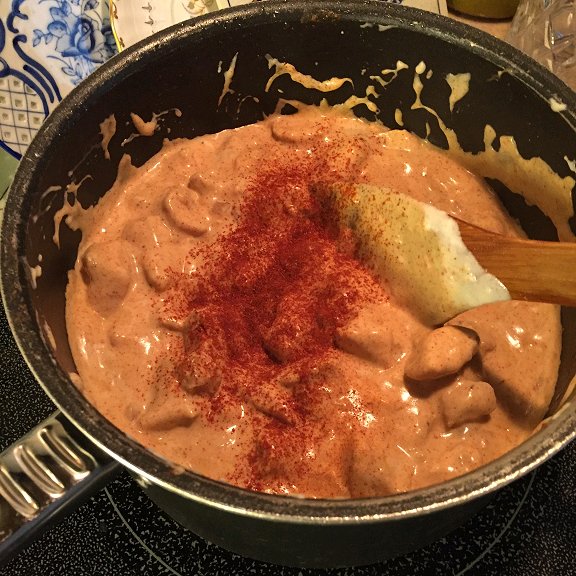
I usually throw an extra pinch of two of paprika in because I like to really taste the paprika, but be careful to not add too much or it will taste bitter. Add the salt and black pepper and stir to combine.

Serve over rice, mashed potatoes, or egg noodles. Serve with steamed broccoli or peas. Refrigerate leftover for up to three days. That's it! Enjoy!

Pin this post!

You might also like:


Article copyright Laura Beth Love 2021 and may not be republished in print or other media without express written permission from the author. For any link updates or corrections leave correct info in comment area. 

Friday, January 17, 2020

Jalapeño Popper Stuffed Biscuits Recipe


Talk about an indulgent comfort food! These Jalapeno Popper Stuffed Biscuits have everything I love: the heat of fresh jalapeno peppers, creamy cream cheese, the hint of sharp cheddar cheese, and crispy bacon bits, all enveloped in a flaky golden biscuit. Yum!

Perfect for game day or movie night, these are quick to make, the recipe only calls for a few simple ingredients, and your family and friends will love them. I promise! If you're lucky to have any leftovers the next day, reheat them in the toaster oven for breakfast.

Instead of mixing the bacon into the filling, I like to use it as a topping before I pop them into the oven - this prevents the bacon from getting soft and gives you that crispy texture that just makes them perfect. 

Scroll down for recipe!


Mix up the filling


Cook and drain the bacon


Flatten the biscuits to create rounds


Place a dollop of filling in the center of each biscuit round


Fold up the edges of the biscuit and pinch to create a blossom


Place them on a cookie sheet


Top each one with the bacon pieces


Bake until golden brown


Ingredients
For this easy recipe you will need:
1/4 to 1/2 cup chopped fresh jalapeno peppers (more seeds = more heat)
1 8-oz. package cream cheese, softened
3/4 cup shredded cheddar cheese
1 package of refrigerator biscuits (8 biscuits)
1/2 pound bacon, crisped and broken into bits

Directions:

Fry the bacon until crispy and then drain on paper towels. Once the bacon cools, break into small pieces and set aside.

Next prepare the filling by mixing one package of cream cheese in an electric mixer until soft. Stir in 3/4 cup of shredded cheddar cheese and between 1/4 to 1/2 cup of diced fresh jalapeno peppers. If you like it mild, use only 1/4 cup of diced peppers and remove most of the seeds. If you like it hot, leave in a bit more seeds and use 1/2 cup of diced peppers. Remember, the heat comes from the pepper's seeds, so you can adjust the heat of your mixture by removing some seeds or adding more seeds.

Use a rolling pin to flatten out each biscuit into a flat circle shape. 

Place a large dollop of filling (I used about 3 big Tablespoons of filling in each one) in the center of each biscuit round, and then bring up the sides of each biscuit, pinching to gather around the edges to create a bowl-shaped dumpling with an open top. 


Place each shaped and filled biscuit on a lightly greased baking sheet.

Top the opening of each biscuit with bacon pieces.

Bake in a 350 degree preheated oven 14 to 18 minutes or until the edges of the biscuits are golden brown. 


Pin this post!


Try them and let me know what you think!


Have a great week!
Laura

Join me on: 


Article copyright ©Laura Beth Love 2020 and may not be republished in print or other media without express written permission from the author. For any link corrections please leave correct info in comment area.

Friday, June 22, 2018

What Is City Chicken? Old Fashioned City Chicken Recipe


If you have never heard of City Chicken then read on!

What is City Chicken? What is the origin of City Chicken?
City Chicken is a Depression-era meal that is not found in cookbooks. Believe it or not, there was a time in history (pre-1940's) when chicken was actually more expensive than pork, veal, or beef. Poultry farms weren't yet industrialized and available everywhere like they are today, so chicken wasn't as accessible as you might think. 

Yup, it's true! Since folks couldn't afford the expensive chicken, they would use pieces of pork, veal, and/or steak, and skewer them onto a bamboo skewer, bread with seasoned breading, and then fry and/or bake. What exactly is City Chicken? It's not chicken at all, but is made from other meats and shaped to look like a drumstick! 

So gather your supplies, whip up a batch of mashed potatoes and gravy, saute some asparagus or fresh green beans, and make your first batch of City Chicken! 

Best City Chicken Recipe

For this recipe you will need:
Bamboo skewers (about 8 inch long)
Shake & Bake Pork flavor
*For the meat, I use about 1 lb of pork and 1 lb of steak, for about 4 people, so you can adjust accordingly:
Lean pork cubes (I use cup up boneless pork chops)
Lean steak cubes
2 large eggs
splash of milk (about 1/4 cup)
Olive Oil & Crisco solid shortening

Gather all ingredients.
1. Soak the bamboo skewers in warm water for a while before you start, at least 30 minutes is good, a few hours is better. While they are soaking, find a casserole dish that will accommodate the length of the skewers for when you bake them in the oven (I usually use a big lasagna pan).

2. Cut pork and steak into bite-sized pieces for skewering.


3. Skewer the pork and steak cubes onto the bamboo skewers, alternating pork and steak. Do not fill the entire skewers end-to-end, instead leave some space at each end. One inch or so is good. This will make them easier to handle.

4. Put Shake & Bake coating into the bag provided (you can also use regular bread crumbs if you prefer. I find the Shake & Bake makes them nice and crispy).

5. In a pie plate or dish large enough to fit the skewers, beat the two eggs with the milk. 

6. Doing one skewer at a time, dip the meat-filled skewer into the egg and milk mixture and coat the meat on the skewer completely.

7. Allow excess egg to drip off of the skewer and then place the skewer in the bag with the breadcrumbs/Shake & Bake and coat the meat completely with the coating, using your hand outside the bag to squeeze the coating onto the meat. Squeezing it on will make the breading stick very well. Remove skewer from bag and set aside on a plate. Repeat steps above until all skewers are filled with meat, dipped in egg mixture, and breaded. 

8. In a large frying pan melt about 1/3 cup of Crisco solid shortening on medium-low heat until melted and hot - you can use half Crisco and half olive oil instead, or whatever frying of that you prefer. Preheat oven to 350 degrees Fahrenheit.

9. Once shortening/oil is hot, place a few of the breaded meat skewers into the oil and lightly fry to brown the outsides for just a minute or two each. Watch carefully so they don't burn. Use tongs to turn them and once they are brown, remove them and place them on a plate covered with paper towels to drain off the excess oil. 


10. Once all skewers are fried and drained, turn off the oil and remove from heat. Transfer each of the skewers from the paper towels to a lasagna dish or other casserole dish. Cover with foil.

11. Bake in a preheated 350 degree F oven for one hour.


12. Optional: bake for an additional 5 minutes with foil removed to dry out a bit if they look too wet. 


Soak the skewers ahead of time so they won't singe when you fry and bake them


Prepare your egg and breading mixes and set aside


Cube your pork and beef into bite-sized pieces


Skewer the pork and beef, alternating them if you like


These are ready to be dipped in the egg mixture and then breaded


Breaded and ready to be fried up


Fry for a just a minute or two to brown the outsides


Drain the fried skewers on paper towels to blot off extra fat and then place them in a baking dish, cover, and bake for one hour


From oven to table! Golden baked City Chicken. Best city chicken recipe ever!


Serve with a veggie of your choice and mashed potatoes and gravy: perfect comfort food!


Pin this post!


I hope you enjoyed this post.
Please leave me a comment below!

Have you ever eaten City Chicken? 


Have a great week!
 Laura


Article & images copyright ©Laura Beth Love for Dishfunctional Designs™ 2018
all rights reserved

Monday, January 29, 2018

Best Ever Homemade French Onion Soup


Well, it looks like snow is back on the menu for tonight into tomorrow—at least it is for us here in Pennsylvania— I'm hoping for a snow day for my kids, or at least a late start! 

What could be better for a snow day than homemade French Onion Soup, complete with crusty croûtes and bubbly, melted Swiss cheese? 

Nothing. Nothing could be as good as that because FOS rocks. So, don't wait for the next blip on the storm chaser website calling for snow to run out and get the ingredients to make this beautiful soup—instead, put the ingredients on your shopping list right now! And after you make it, be sure to come back and leave me a comment below and let me know how much you loved it, because this is the best recipe ever!

(complete recipe at end of post)
You will need 4 tablespoons of butter and 4 tablespoons of olive oil.

In a large soup pot melt 4 tablespoons of butter and 4 tablespoons of olive oil over low heat.

I use regular yellow cooking onions for this recipe, and a bakery baguette loaf.

Peel and chop 4 cups of onions. I like to chop them into cubes that are about 1/2 to 3/4 inch in size.

How you cook the onions is very important. You do not want to cook them too fast on too high a heat, or they will not cook evenly and you will land up with burned onions. You want to cook them relatively low and slow, allowing them to become soft and translucent, and then golden brown. 

To do this, add onions to the pot with butter and olive oil and cook, covered, over low to medium low heat until onions start to turn translucent. Keep an eye on them and stir occasionally. 

Onions beginning to turn translucent

Once they become translucent, sprinkle 1/2 teaspoon of sugar over the onions and stir, this will help the onions to caramelize. Continue to cook the onions until they are a beautiful golden color. 

If you need to turn up the heat to help brown them, go ahead, but don't walk away from the stove. Stand there and stir them to make sure they don't burn!


Now add: 1/2 teaspoon of salt and 2 heaping tablespoons of flour stirring into the onions until coated. Then add your beef stock: You can use either 2 quarts of beef stock or 4 cans of beef consommé concentrate with 3 cans of *water. *Only add the water if you are using beef consommé concentrate. I like to use a bit less water with my consomme and add 1 to 2 cups of white wine. 

If you do not want to add wine to your soup, then just omit the wine and add an extra cup of water -  be sure to taste during the process. You do not want to end up with watered down soup! 

Stir in the beef stock/consomme and water

Add wine and stir. I start with one cup of wine and then taste. Sometimes I add a second cup of wine if the consomme is a bit strong. Simmer over low heat while you prepare the cruets. 

Prepare croûtesSlice baguette into 1 inch slices, cutting the bread at a diagonal to make elongated shaped slices. Lightly brush one side of each slice with melted butter and place on cookie sheet. 

If you would like to make croutons instead, just cut each slice into four cubes after buttering and then place on cookie sheet.

Toast in 300° F oven watching carefully and turning to brown both sides, about 10 minutes. Remove from oven and set aside to cool.

To serve,fill bowls 2/3 full with soup. Top soup with croutons/croûtes.

Sprinkle croûtes with Swiss cheese and place under broiler until cheese melts and bubbles.

Perfect!


French Onion Soup

4 tablespoons butter
4 tablespoons olive oil
4 cups onions, peeled and diced
1/2 teaspoon sugar
4 cans Beef consommé
3 cans water
1-2 cups of dry white wine, to taste
2 heaping Tablespoons flour
1/2 teaspoon salt
Fresh ground black pepper, to taste

For croûtes:
Loaf of crusty baguette
2 tablespoons melted butter
8 ounces shredded Swiss cheese

In a large soup pot melt 4 tablespoons of butter and 4 tablespoons of olive oil over low heat.

Peel and chop 4 cups of onions. I like to chop them into cubes that are about 1/2 to 3/4 inch in size.

How you cook the onions is very important. You do not want to cook them too fast on too high a heat, or they will not cook evenly and you will land up with burned onions. You want to cook them relatively low and slow, allowing them to become soft and translucent, and then golden brown. To do this, add onions to the pot with butter and olive oil and cook, covered, over low to medium low heat until onions start to turn translucent. Keep an eye on them and stir occasionally. Once they become translucent, sprinkle 1/2 teaspoon of sugar over the onions and stir, this will help the onions to caramelize. Continue to cook the onions until they are a beautiful golden color.

Now add: 1 teaspoon of salt, 2 heaping tablespoons of flour and stir into onions until they are coated. And your beef stock: You can use either 2 quarts of beef stock OR 4 cans of beef consommé concentrate with 3 cans of water (only add the water if you are using beef consommé concentrate.)
Add 1 to 2 cups of dry white wine (Chablis) to taste. Add ground black pepper to taste.
Stir and allow to simmer on low.

Prepare croûtes
Slice baguette into 1" thick slices, cutting the bread at a diagonal to make elongated shaped slices.
Lightly brush one side of each slice with melted butter and place on cookie sheet. If you would like to make croutons instead, just cut each slice into four cubes after buttering and then place on cookie sheet.
Toast in 300° F oven watching carefully and turning to brown both sides, about 10 minutes. Remove from oven and set aside to cool. Once cool, store in a food storage container or bag until ready to use, or to store extras.

Shred Swiss cheese.

To serve: fill bowls 2/3 full with soup. Top soup with croutons/croûtes, sprinkle with Swiss cheese and place under broiler until cheese melts and bubbles.


Pin this post! 

What do you think? Are you a fan of French Onion Soup?
Have you ever made your own?


Have a great week!
 Laura


Article, images, and designs copyright ©Laura Beth Love for Dishfunctional Designs™ 2018
all rights reserved