Showing posts with label home organization. Show all posts

Friday, February 9, 2018

How To Organize Your Beads For Jewelry Making

When you first start jewelry making and beading, one of the first things you will discover is that you need storage for your beads and jewelry components! I think it's really important to be organized from the get go—it's a real pain to try and organize in a particular way if in the beginning you just lump all of your beads together, so start out by thinking about how you would like your beads organized, and then follow through with that. 

In this blog post I am going to share with you how I organize some of my own beads and components for jewelry making. Everyone has their own ways of doing things. The following are the things that worked best for me, but by all means, do what works best for you!

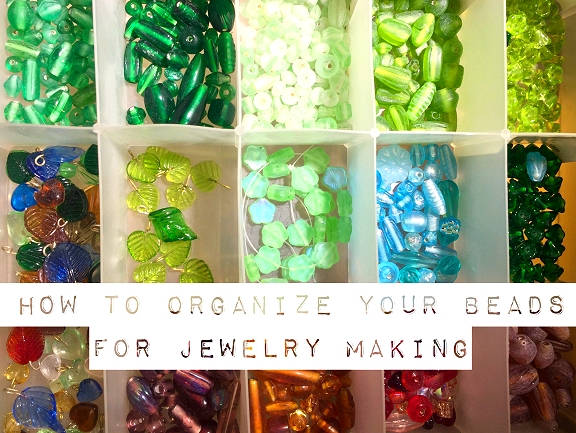
I organize my beads in a few different ways. First off, I organize by color. This is especially helpful for jewelry making, because obviously you are going to be creating things that most often are color-coordinated, so it makes sense to have all different shades of, say, green - together so that you can see the differences in hues and shades and tones, all in one box. Doing it this way makes it easy to pick just the right color. 

I also organize my beads by material. I most often use beads that are stone and glass. I have a lot of stone beads, and I have a lot of glass beads. Sometimes I mix these different material beads in one project, but most often I create something that is strictly all gemstone/stone, or all glass. 

That being said, I have one set of boxes that are all stone beads, and another set of boxes that are all glass beads. Both sets of boxes are arranged by color. I have one specific box for each color or color family.

I use standard plastic bead boxes that I bought years ago at a craft store - I think it was either Michael's or ACMoore, and I think they came in packs of 2 or 3 or 4—I forget—but my point is that you do not need anything fancy or expensive to store your beads in. The containers I use each have about 17 separate pockets for beads, which stores plenty per box.


I keep most of my boxes stacked in an old bookcase, which works great since it allows me to keep them at eye level and easy to reach. 

Here you can see a few of the examples of my organization by color family. I have one box for pinks & reds, one for yellows & oranges, one for browns & earth tones, etc. 


I also have boxes for different types of metal beads and different finishes. There are sterling silver, silver plated, copper, vintage silver, etc. 


I keep special rows of boxes that contain the things that I use most often. This makes it easy to grab them without searching. Things like pearls, clasps, sterling silver components and Swarovski crystals—I box the crystals by size...one box for 6mm, one for 4mm, etc.  


Here's a peek into one of my blue stone boxes. I have a few blue boxes—one for turquoise shades, one for true blues, one for greenish-blues, etc.


Here's one of my yellows & oranges boxes, where I store things like amber, carnelian, and citrine. 


Here's one of my pearl boxes - I try to organize them by size and shape. I peel the sticker labels off of the bags that they arrive in from the supplier, and stick those labels into the box sections with the beads. This makes it easy to see the sizes at a glimpse, and makes it easy to reorder them if needed.


Here you can see that I saved the bead-strand tags and put them in with the beads. It can be easy to forget what stone is what! Keeping the prices with the beads is essential to determining how to price your finished jewelry. Just how much did you pay for those beads? How much for the strand? How many were on the strand? How much does that come to per bead?


Here is the same photo showing the reverse sides of the tags. Here it tells you info such as: how many beads were on the strand, the name of the stone, whether it was treated (dyed, hardened, etc), and a brief description of shape and or size.


I like to keep metal components in small plastic bags to deter tarnishing, which is oxidation of the metal from it's exposure to air. 

 Here is a box of my glass beads, greens with a few other colors. 

I love green.


I keep many other supplies in these photo boxes that you can buy at most craft stores (I think I bought mine at ACMoore.) These are great for storing wire, chain, jump rings, and headpins—things I buy a lot of.


And finally, no matter how organized I keep my supplies, my workspace usually looks like this! 

I hope you enjoyed this peek into my bead storage and organization and hopefully you were able to take away a good hint or two for organizing your own beads and jewelry making supplies! Happy jewelry making! 


Pin this post! 


Have a great week!
 Laura


Article, images, and designs copyright ©Laura Beth Love for Dishfunctional Designs™ 2018
all rights reserved

Friday, June 9, 2017

DIY Tiered Jewelry Organizer Made From Vintage China Plates & Teacups


Today I'm going to show you how you can turn your thrift store and flea market teacups, plates, and saucers into a pretty tiered organizer. This organizer is great for holding jewelry or other small collections, makes a unique candy dish, and is certainly a conversation piece. All you need are a few supplies. It's easier than you might think! 

Assemble your supplies
First, let's gather our supplies. For this project you will need a variety of old plates, saucers, and teacups. You will need a tube of E6000 adhesive. This is available at hardware stores, department stores such as Target, and even in some grocery stores. Due to the materials we will be gluing, I do not recommend using any other adhesive. Hot glue will not work, nor will water-soluble school glue, so get yourself a tube of E6000. 


You will need a disposable popsicle stick or craft stick to help spread the glue, and you will need some old newspaper to cover and protect your tabletop while you work. 

A paper plate or a piece of waxed paper comes in handy when you need to set your glue-covered craft stick down, so you may want to keep one of those at your workstation too. And remember, when using any type of adhesive, always be sure to work in a well-ventilated area.


Choosing your china
For the organizer we are going to make today, you will need three plates and three teacups. From the bottom up, our organizer will look like this: plate, teacup, plate, teacup, plate, teacup.

To keep your tiered organizer from being top-heavy and toppling over, we need to build our organizer so that the largest and heaviest plates and cups are on the bottom, and the smaller and lighter ones are on the top. Think about this when you are choosing your china. 


Before we glue any of our pieces together, we will first pick them out and stack them up so we can see how our finished project will  look.

First, choose a heavy plate for the bottom so that your organizer has a sturdy base. Remember, we are going to be stacking china on top of this plate, so it has to be large and heavy so that your "china tower" does not topple over. Once you have chosen your base plate, set it aside and choose your first teacup that will be glued to the top of that plate. This teacup will be glued upside-down to the bottom plate. This is because the diameter of the cup's opening is (most likely) larger than the diameter of the bottom of the cup. 


Once you have chosen your first cup, set it aside next to your base plate and then choose your middle plate. This plate will be glued on top of the bottom of the teacup that you just chose. Make sure you choose a plate that has a smaller diameter than your base plate. Your middle plate should also be lighter than your base plate. Once you have chosen that plate, try it out to see how it looks stacked up and then set it aside. 

Note: if using elongated plates, you can either line them up or stagger them, as shown in the photos below:


Plates lined up with each other. 


Plates staggered.


Next, choose your second tea cup. This cup will be glued upside-down on top of the middle plate that you just chose. 


Once you have chosen your second teacup, choose your third plate. This plate will be situated on top of the bottom of the teacup that you just chose. Choose the smallest and lightest plate for this position. A saucer often works great for this position. 


Finally, you will choose your third and last teacup to complete your china tower. This teacup will be glued right-side-up on top of the small plate or saucer that you last chose. 


Now that you have all of your china picked out and you know what is going where, it's time to glue them together! Before you glue, make sure all pieces are clean and dry. We will glue them together from the bottom up.

 Open your adhesive and carefully apply a ring of glue around the rim of the first (bottom) teacup, and then place the teacup, glue-side down onto the top center of your bottom plate.


Now - it is up to you whether you want to continue gluing right away, or wait until those two pieces have dried. I recommend allowing them to dry overnight before adding the next piece. Either way, next you will glue the center plate to the bottom of the bottom cup, allow that to dry, and then add your second cup  - once again upside-down, and once that is dry add your small plate, and then your final top cup, which you will glue to the small plate right-side-up. 

Another option is to forgo the top teacup and use the small plate as your top tier. It's a matter of personal taste. Do what you think looks best. Below are two different ways of stacking elongated plates - lined up or staggered.


Staggered elongated plates


I hope you enjoyed this tutorial! Please share this post with your friends and remember, I always love to see your creations so feel free to email them to me via my Etsy shop or  on my Facebook page (links in the right hand sidebar).


What do you think?


You might also like: 


Have a great week!
Laura

Article and images copyright ©Laura Beth Love 2017 and may not be republished in print or other media without express written permission from the author.

Wednesday, July 18, 2012

Hold It Right There! Creative Coat Racks & Hooks


Whether you use them to hang your coat, scarf, handbag, belts, jewelry or keys, racks and hooks are essential organizational must-haves for your home. Not only do they help keep us organized and tidy, they also add interest, shape, and color to our walls. Hung in an entry way, mudroom, hallway, bath or bedroom, these racks can serve a multitude of purposes throughout your entire home. 

But don't stop there! 
Hanging a clever or unusual rack is a great way to show off your own unique personality and style. Check out this collection of unique and creative coat racks & hooks and I think you'll agree!


Coat rack made from upcycled bicycle parts and other found objects:
Coat rack made from upcycled bicycle parts and other found objects (above and below) by Matt Shiley


Coat rack made from upcycled bicycle parts and other found objects:


4 Rustic Wall Hooks
Surfboard coat racks by ProjectCottage via Etsy


C-Clamp Coat Rack
C Clamp coat rack by Gbtrains via Etsy


Modern Pot Rack, Coat Rack, Utensil Rack, Forged Hooks, Made by Mike Hill, Artist Blacksmith
Modern coat or pot rack in iron with forged hooks by ArtInIron via Etsy


rustic barn wood and antique doorknob coat rack. reclaimed, upcycled
Rustic barn wood and antique door knob coat rack by timsway via Etsy


Coca Cola Wooden Crate Coat Rack Wall Plaque Vintage
Coat rack made from a vintage wooden crate by Tin Barn Treasures via Etsy

Industrial Rolling Garment Rack Possum Belly
Industrial rolling garment rack by KKatz via Etsy


Pipework coat rack from Nick Fraser


Branch coat rack:
Branch coat rack by Jen French


Weathered wood coat rack:
Weathered wood coat rack with worn paint and rustic metal hooks from Pottery Barn Kids


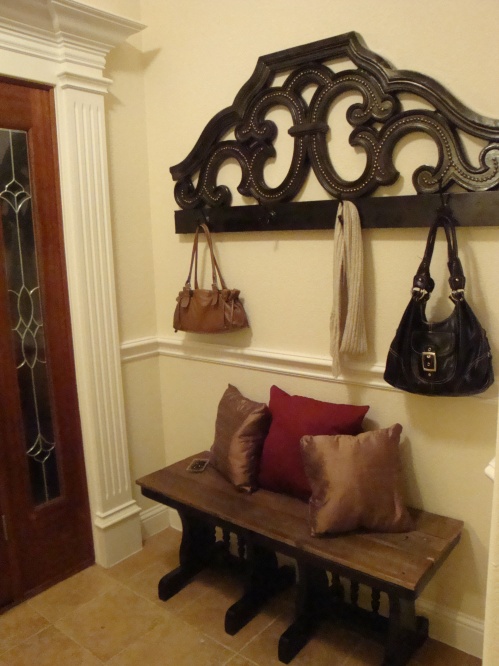
Bed headboard turned coat rack from Be Different Act Normal


[coat+rack+with+scarves_thumb[1].jpg]
Another version of headboard turned coat rack from Censational Girl


Make a DIY rack with decorative knobs:
Make a DIY rack with decorative knobs


Vintage inspired hotel key rack from Mothology


What do you think?

I hope you have a great week 
Love, Laura


My broken china jewelry is always available for purchase at https://www.etsy.com/shop/dishfunctionldesigns