How To Make A Bracelet Using Jewelry Bracelet Blanks
Level: Easy

What is a bracelet blank?
A bracelet blank is a bracelet that has unfinished areas, blank spaces, or "blanks" (sometimes called "discs") that you can glue objects onto to create a finished bracelet. Bracelet blanks come in many different styles, from bangles to cuffs to link styles. They also come in different finishes, such as silver plated, brass, and vintage finishes.
In this DIY I will be explaining how to make a bracelet with the link style bracelet blank. Different styles of link bracelet blanks will have different sized discs, from small to large. You can buy bracelet blanks that have just a few discs, or many, as shown in the photo above.
Where can I get bracelet blanks?
You can find bracelet blanks at just about all major online jewelry supply shops, on Etsy under the "supplies" category, and at most large craft stores. All of the ones shown in this article are available from Rings N Things.
What type of adhesive should I use for gluing things on to bracelet blanks?
The first thing you want to consider before selecting any type of adhesive is what materials you will be gluing together. This is very important. There are all types of glues and adhesives, but some are for specific materials. Rings & Things has a great guide to adhesives that you can read here. I really like E6000 glue. It's widely available, inexpensive, great for binding all types of different materials together, and it's super strong. Be sure to read the instructions on the label and especially follow any safety warnings. Do your gluing in a well-ventilated area!
The first thing you want to consider before selecting any type of adhesive is what materials you will be gluing together. This is very important. There are all types of glues and adhesives, but some are for specific materials. Rings & Things has a great guide to adhesives that you can read here. I really like E6000 glue. It's widely available, inexpensive, great for binding all types of different materials together, and it's super strong. Be sure to read the instructions on the label and especially follow any safety warnings. Do your gluing in a well-ventilated area!
*Note: Certain types of blank bracelets can be soldered. This is an advanced technique that I may discuss sometime down the road, but for now, I want to keep this DIY easy!
What types of objects can I adhere to bracelet blanks? How do I make them?
Fun part! You can glue just about anything to bracelet blanks.
Two things you want to take into consideration are weight and size. Aside from looking awesome, you want your finished bracelet to be comfortable to wear. Objects that are too heavy or bulky will make your bracelet uncomfortable, so try to keep it lightweight, streamlined, and balanced (both visually and weight-wise.)
To make your bracelet: Simply lay out your bracelet along with your items and arrange them until you find an order that is pleasing to you. Apply your adhesive to the bracelet blank and adhere your item. Allow to dry according to the directions on your adhesive. This could be from a few hours to overnight. That's it, it's that simple.
Here are a few ideas of objects you can adhere to bracelet blanks:
Vintage buttons
Beach glass or small pieces of stained glass (remove sharp edges first!)
Vintage typewriter keys
Vintage buttons
Beach glass or small pieces of stained glass (remove sharp edges first!)
Vintage typewriter keys
Bottle caps
Vintage costume jewelry (think orphaned earrings, broken pieces)
Natural materials such as lightweight stones or small wooden branch slices
Charms and findings: vintage brass finish is STILL popular!
Scrabble tiles or game pieces
Things made from polymer clay
Laminated paper - think photos, mini works of art, etc.
Here are a few different types of bracelet blanks:

Bracelet blanks come in a variety of finishes and are inexpensive (about $3 each)


Beach glass and shard by Iris Design Sea Glass Via Etsy

Button bracelet

Layered button bracelets by Homestead Revival

Sea glass bracelet via Martha Stewart

Bottle cap bracelet by Sew T0tally Rad via Etsy
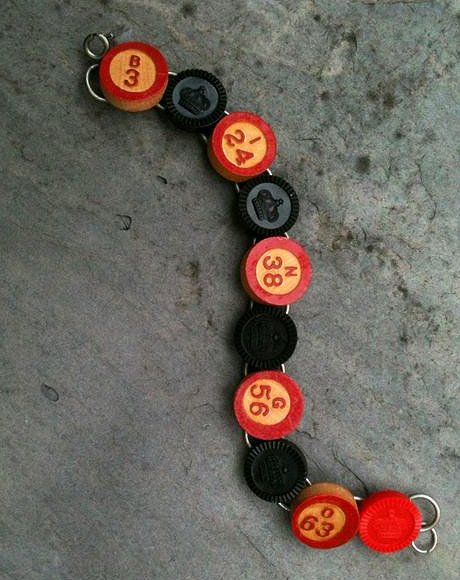
Bingo piece bracelet by Anna Marie via Etsy

Vintage earring bracelets by Jeanette via Etsy

What do you think?
What types of items would you make your bracelet with?
What types of items would you make your bracelet with?
Pin this post!:


My broken china jewelry is always available for purchase at https://www.etsy.com/shop/dishfunctionldesigns
article copyright ©Laura Beth Love 2016 all rights reserved.